
MongoDB
OPQ utilizes MongoDB as its database for all OPQ services. The database is provided as part of our Docker deployment.
Initializing a new database
When you create a new OPQ database for the first time, it's best to ensure that the indexes are created before any data is accepted.
- Copy the ensure-indexes.sh and ensure-indexes.js files from opq/mongod to your host machine.
- Ensure that the MongoDB docker container is running and all other docker containers are stopped.
- Run the ensure-indexes.sh script (
./ensure-indexes.sh)
Note: other initialization activities include setting up TTL indexes and defining schemas. These activities will be documented soon.
Accessing the database
For development purposes, it is often useful to inspect the contents of collections. We use two ways: via the command line Mongo Shell and via the RoboMongo (Robo 3T) GUI.
Mongo Shell access
To access the OPQ database via Mongo Shell, you must first ssh into the server running the MongoDB Docker container. For example, here are instructions to ssh into emilia.ics.hawaii.edu.
Once you've done that, you connect to the running MongoDB Docker container and run the Mongo Shell with:
docker exec -it opq-mongo mongo
RoboMongo access
The access the OPQ database via RoboMongo (Robo 3T) GUI, you must configure your connection in RoboMongo to use port forwarding.
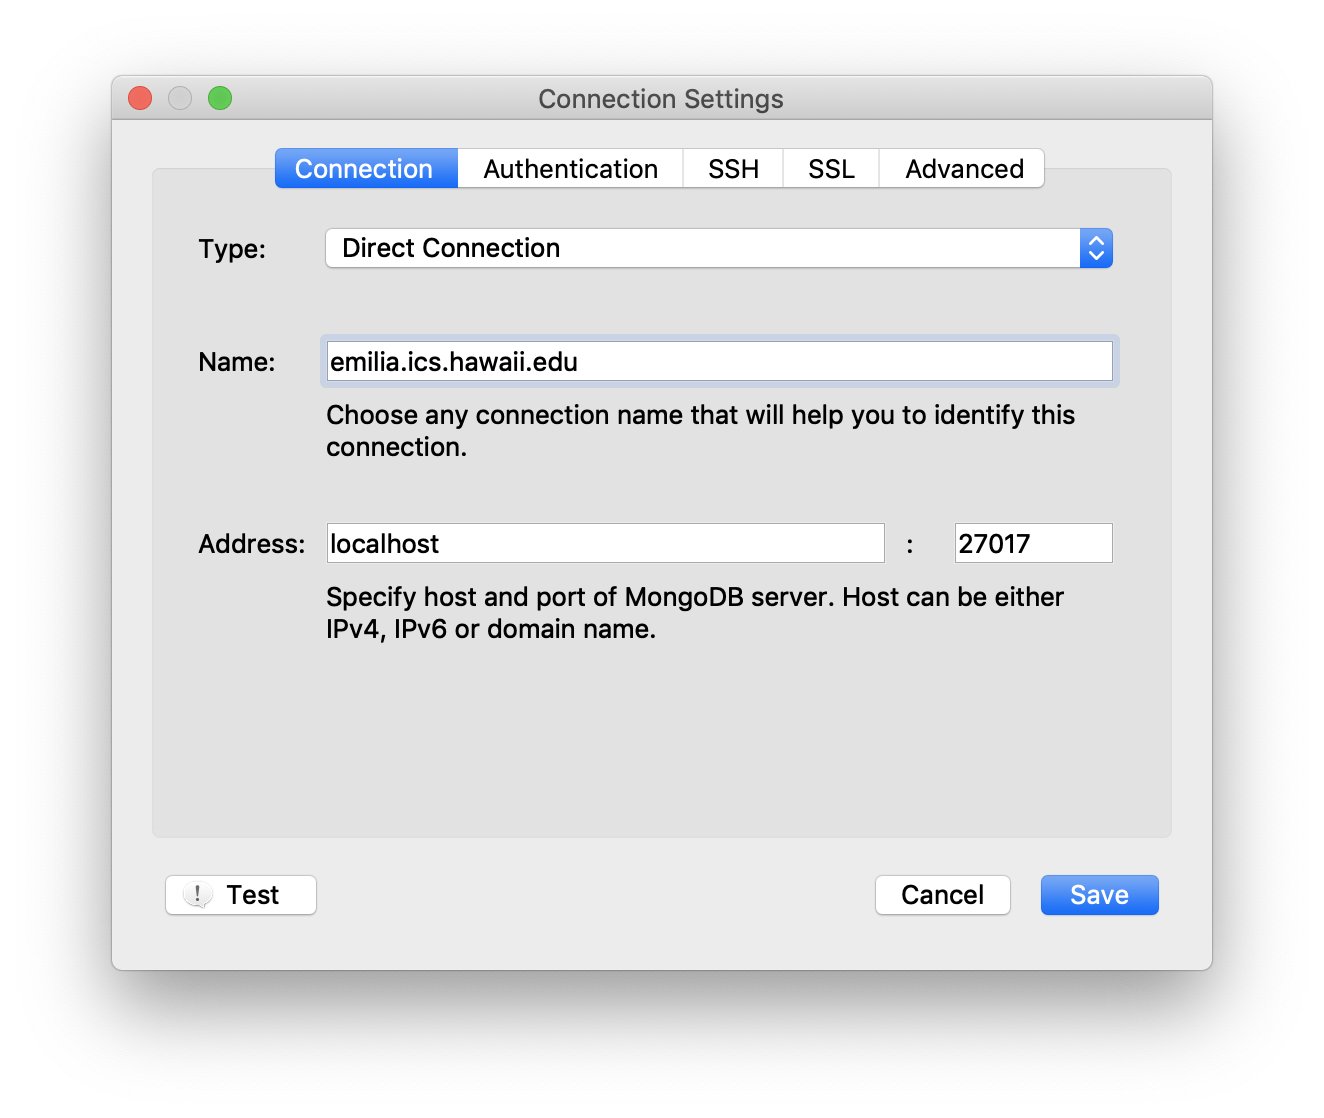
First, create a new connection and name it appropriately. For example, here is the dialog window for creating a connection called "emilia.ics.hawaii.edu":
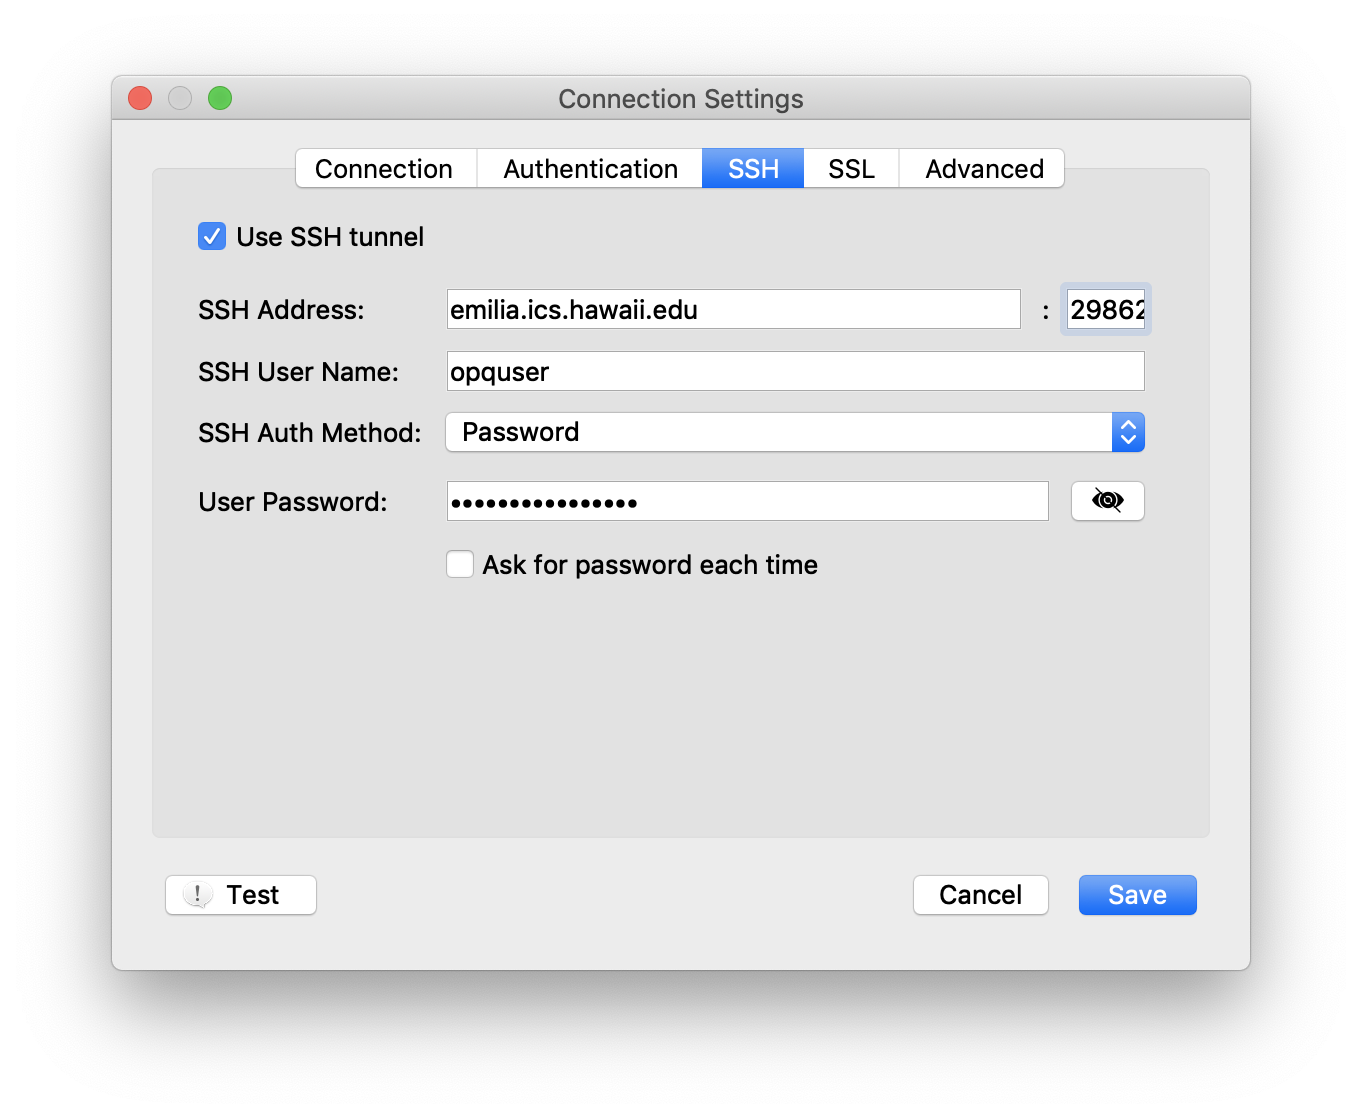
Next, set up SSH access to the server running the MongoDB container. For example, here is the dialog window for defining ssh access to emilia.ics.hawaii.edu.
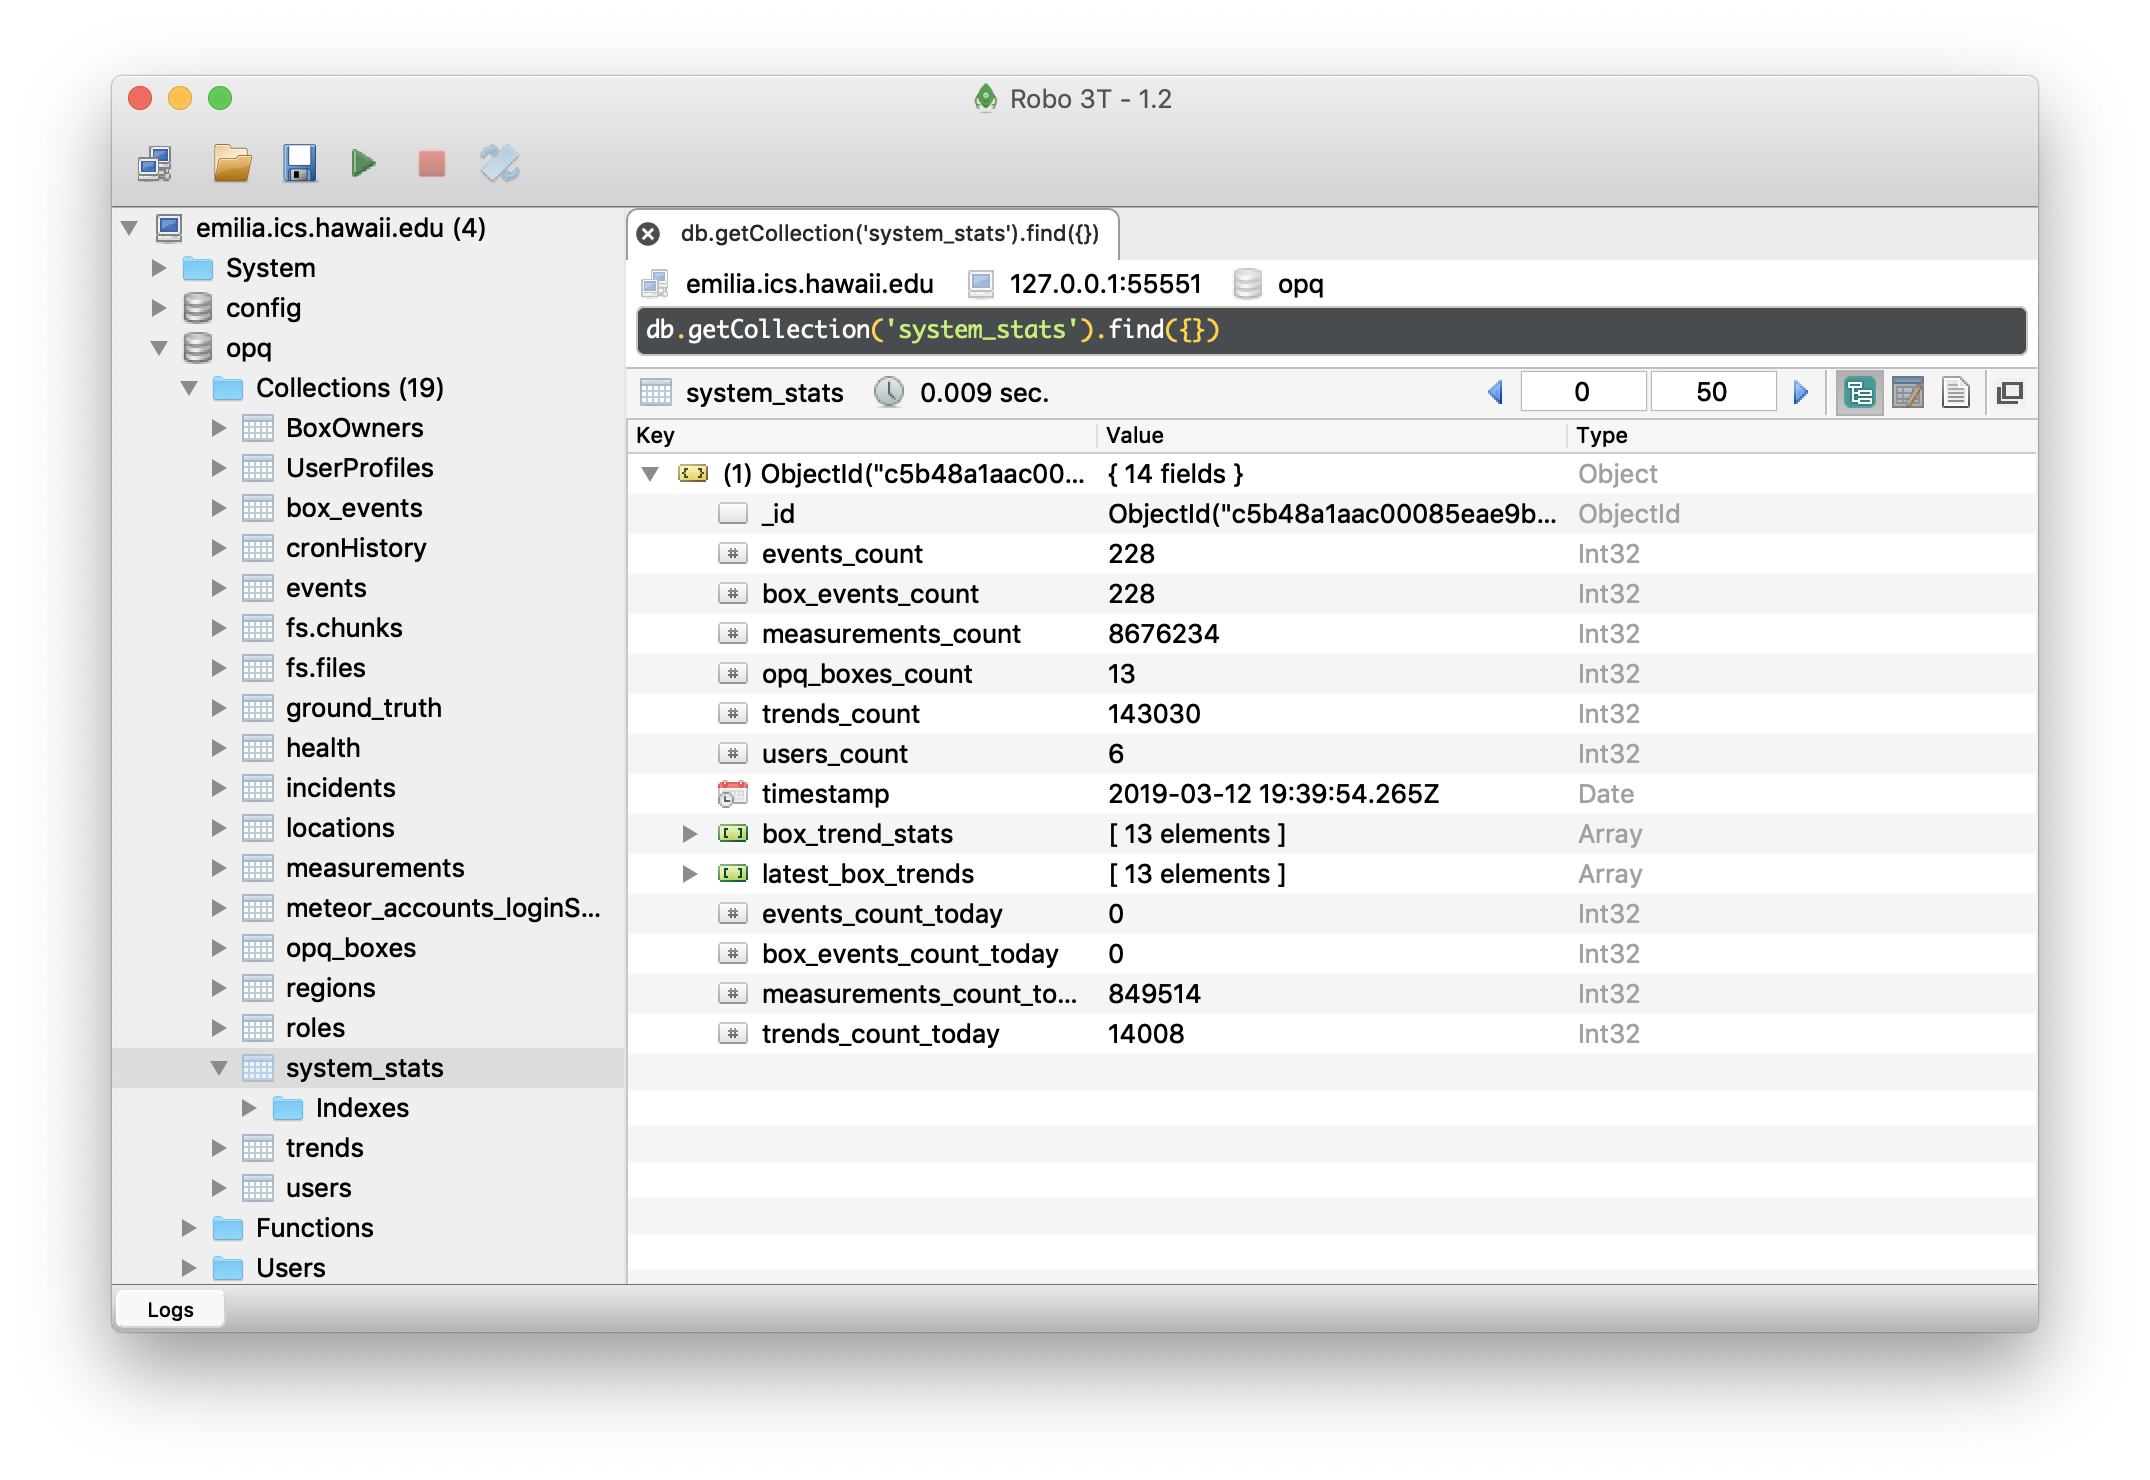
If you have configured things correctly, then you should be able to access the OPQ MongoDB database. For example, here is a screenshot showing a document in the system-stats collection:
Backups
Making a backup
The directory opq/mongod contains helper scripts for backing up and restoring OPQ MongoDB databases.
The steps required for backing up the database is as follows:
- Create a directory on your host machine called
/var/bakthat is readable and writeable to Docker. - Copy the backup-mongodb.sh script from opq/mongod/backup-mongodb.sh to your host machine.
- On the host machine, run
./backup-mongodb.sh
This will produce a compressed and archived backup image of the database in /var/bak and the file name will look like opq.dump.YYYY-MM-DD.bak where YYYY-MM-DD is the current year, month, and day that the backup was created on.
Restoring a backup
The directory opq/mongod contains helper scripts for backing up and restoring OPQ MongoDB databases.
The steps required for restoring a database is as follows:
- Copy the restore-mongodb.sh script from opq/mongod/restore-mongodb.sh to your host machine.
- Ensure that all docker containers except for mongo are stopped. We don't want services reading or writing to the database while we restore.
- On the host machine, run
./restore-mongodb.sh [path to backup archive]where [path to backup archive] is the full path to the backup archive on the host machine (e.g. /var/bak/opq.dump.2019-03-07.bak) - Restart the rest of the docker containers.
Automating backups
It's possible to automate the backup process using a cron job on the host machine. We create backups of the database once per day at midnight.
- Copy the backup-mongodb.sh script from opq/mongod/backup-mongodb.sh to your host machine (ours is stored in /home/opquser/backup/backup-mongodb.sh).
- Edit cron. Type
crontab -eto open the crontab editor. - Add the following cronjob:
0 0 * * * /bin/bash /home/opquser/backup/backup-mongodb.sh >> /home/opquser/backup/backup.log 2>&1 - Edit the above crontab so that the paths match your machine.
- From here, management of backups is up to you. As an example, our crontab also uploads each night's backup to Google drive and then deletes the local backup.