OPQ Box User Guide
Basic installation
Obtain an OPQ Box
First, obtain an OPQ Box. Currently, your primary option for obtaining an OPQ Box is to contact the Open Power Quality project via Professor Philip Johnson (johnson@hawaii.edu). We cannot produce OPQ Boxes at scale at this time.
If you have hardware expertise, another option is to build an OPQ Box yourself from our schematics. If you are interested in going this route, please contact us with any questions you have and we will do our best to help you.
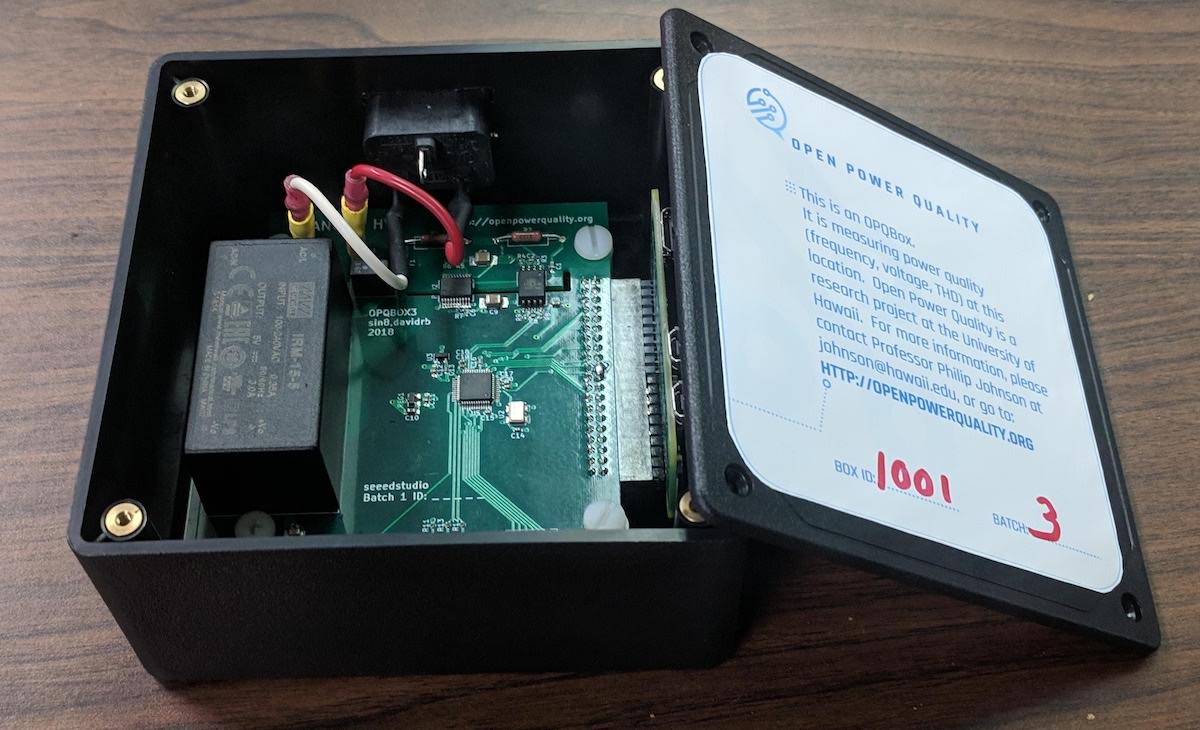
Currently, an OPQ Box device is about 4 inches wide and three inches tall, and looks like this when its cover is removed:
Obtain an OPQ Cloud account
To access the data collected by your OPQ Box, you will need an account on an OPQ Cloud system. If you plan to store your data in the University of Hawaii OPQ Cloud system, then please contact Professor Philip Johnson to create an account for you. Otherwise, contact the adminstrator of your local OPQ Cloud instance to request an account. When setting up the OPQ Cloud account, the administrator will want to know the following:
- Your email address (to be used as your username)
- The Box ID of your OPQ Box (if the admin doesn't already know it)
- The location where you intend to install your OPQ Box.
The administrator will let you know the URL to your OPQ Cloud, and your password after setting up this information.
Connect OPQ Box to the Internet
The OPQ Box needs to be able to send data to the OPQ cloud services over the Internet. To accomplish this, it needs to know the name and (if required) password for your wireless network.
To obtain these credentials, you must plug in your OPQ Box, then wait approximately 1 to 2 minutes for it to boot up. At that point, you should find that your laptop or mobile device shows a new public wireless access point called "OPQ". Connect to that access point with your laptop or mobile device.
Once you are connected to the OPQ network, bring up a browser and go to http://10.42.0.1:8888/. Your browser should then display a page that lists all the wireless access points found by the OPQ Box as well as Box configuration options. Here's an example screen image:
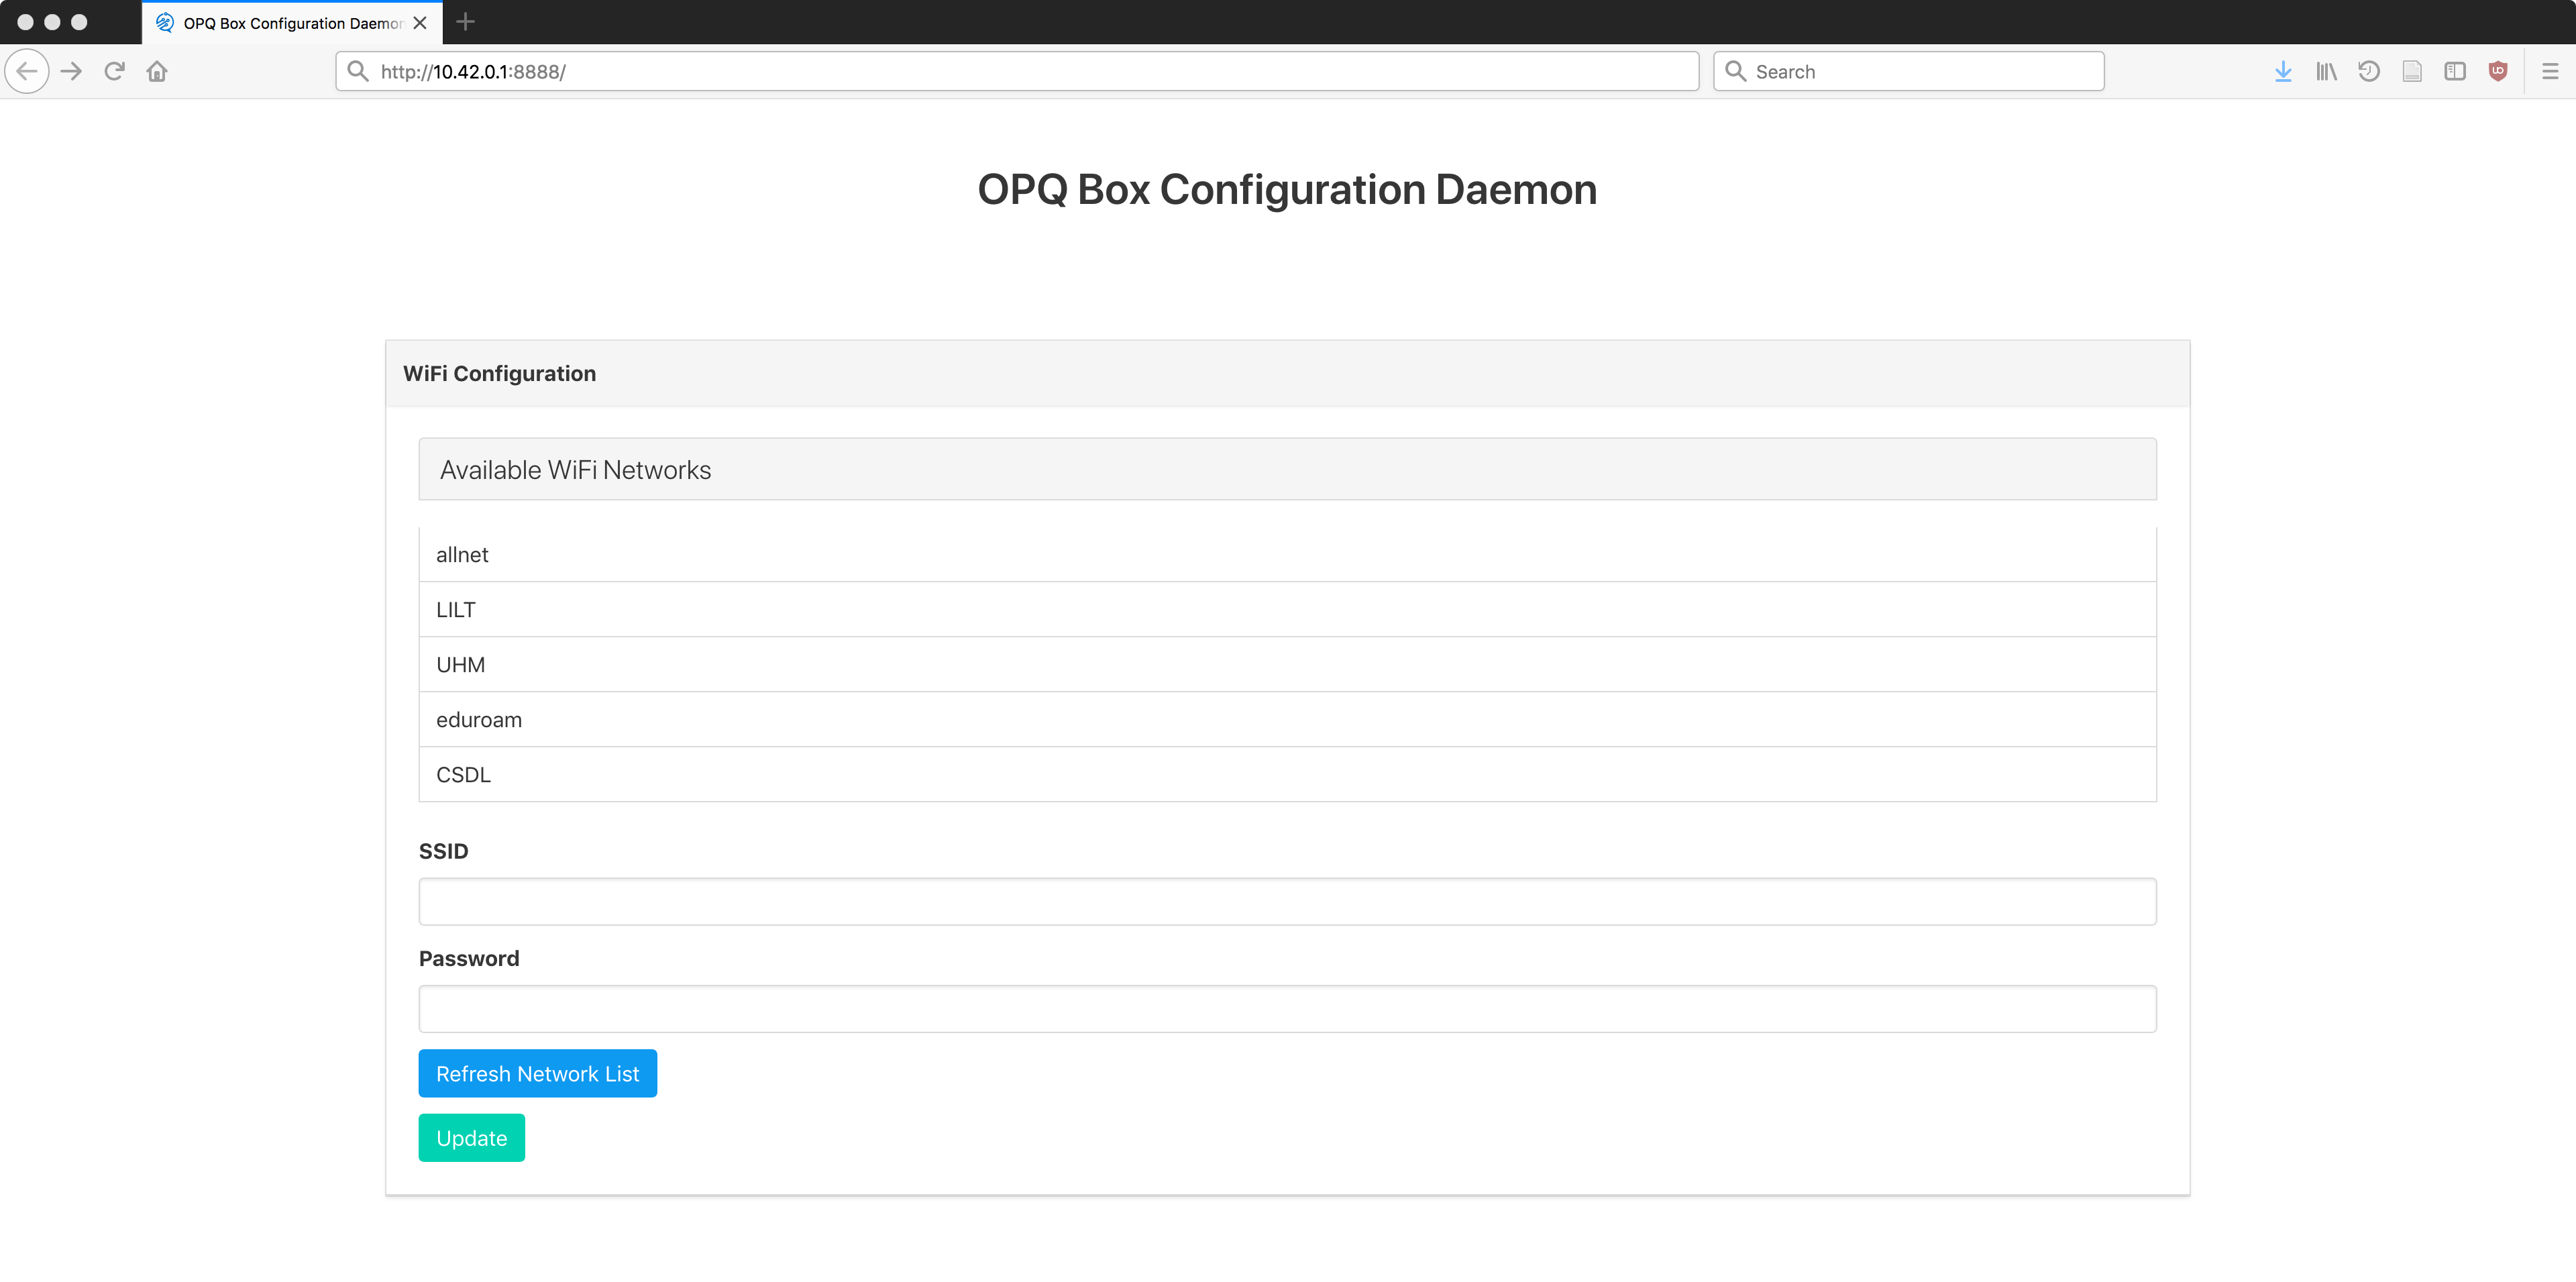
You can click either an existing available network which will copy the network name to the SSID field or you can edit the SSID and Password fields directly.
If the network is hidden, you can enter the name of the hidden network directly into the SSID field.
If a network is open and does not require a password, only enter the network name in the SSID field and leave the password field blank.
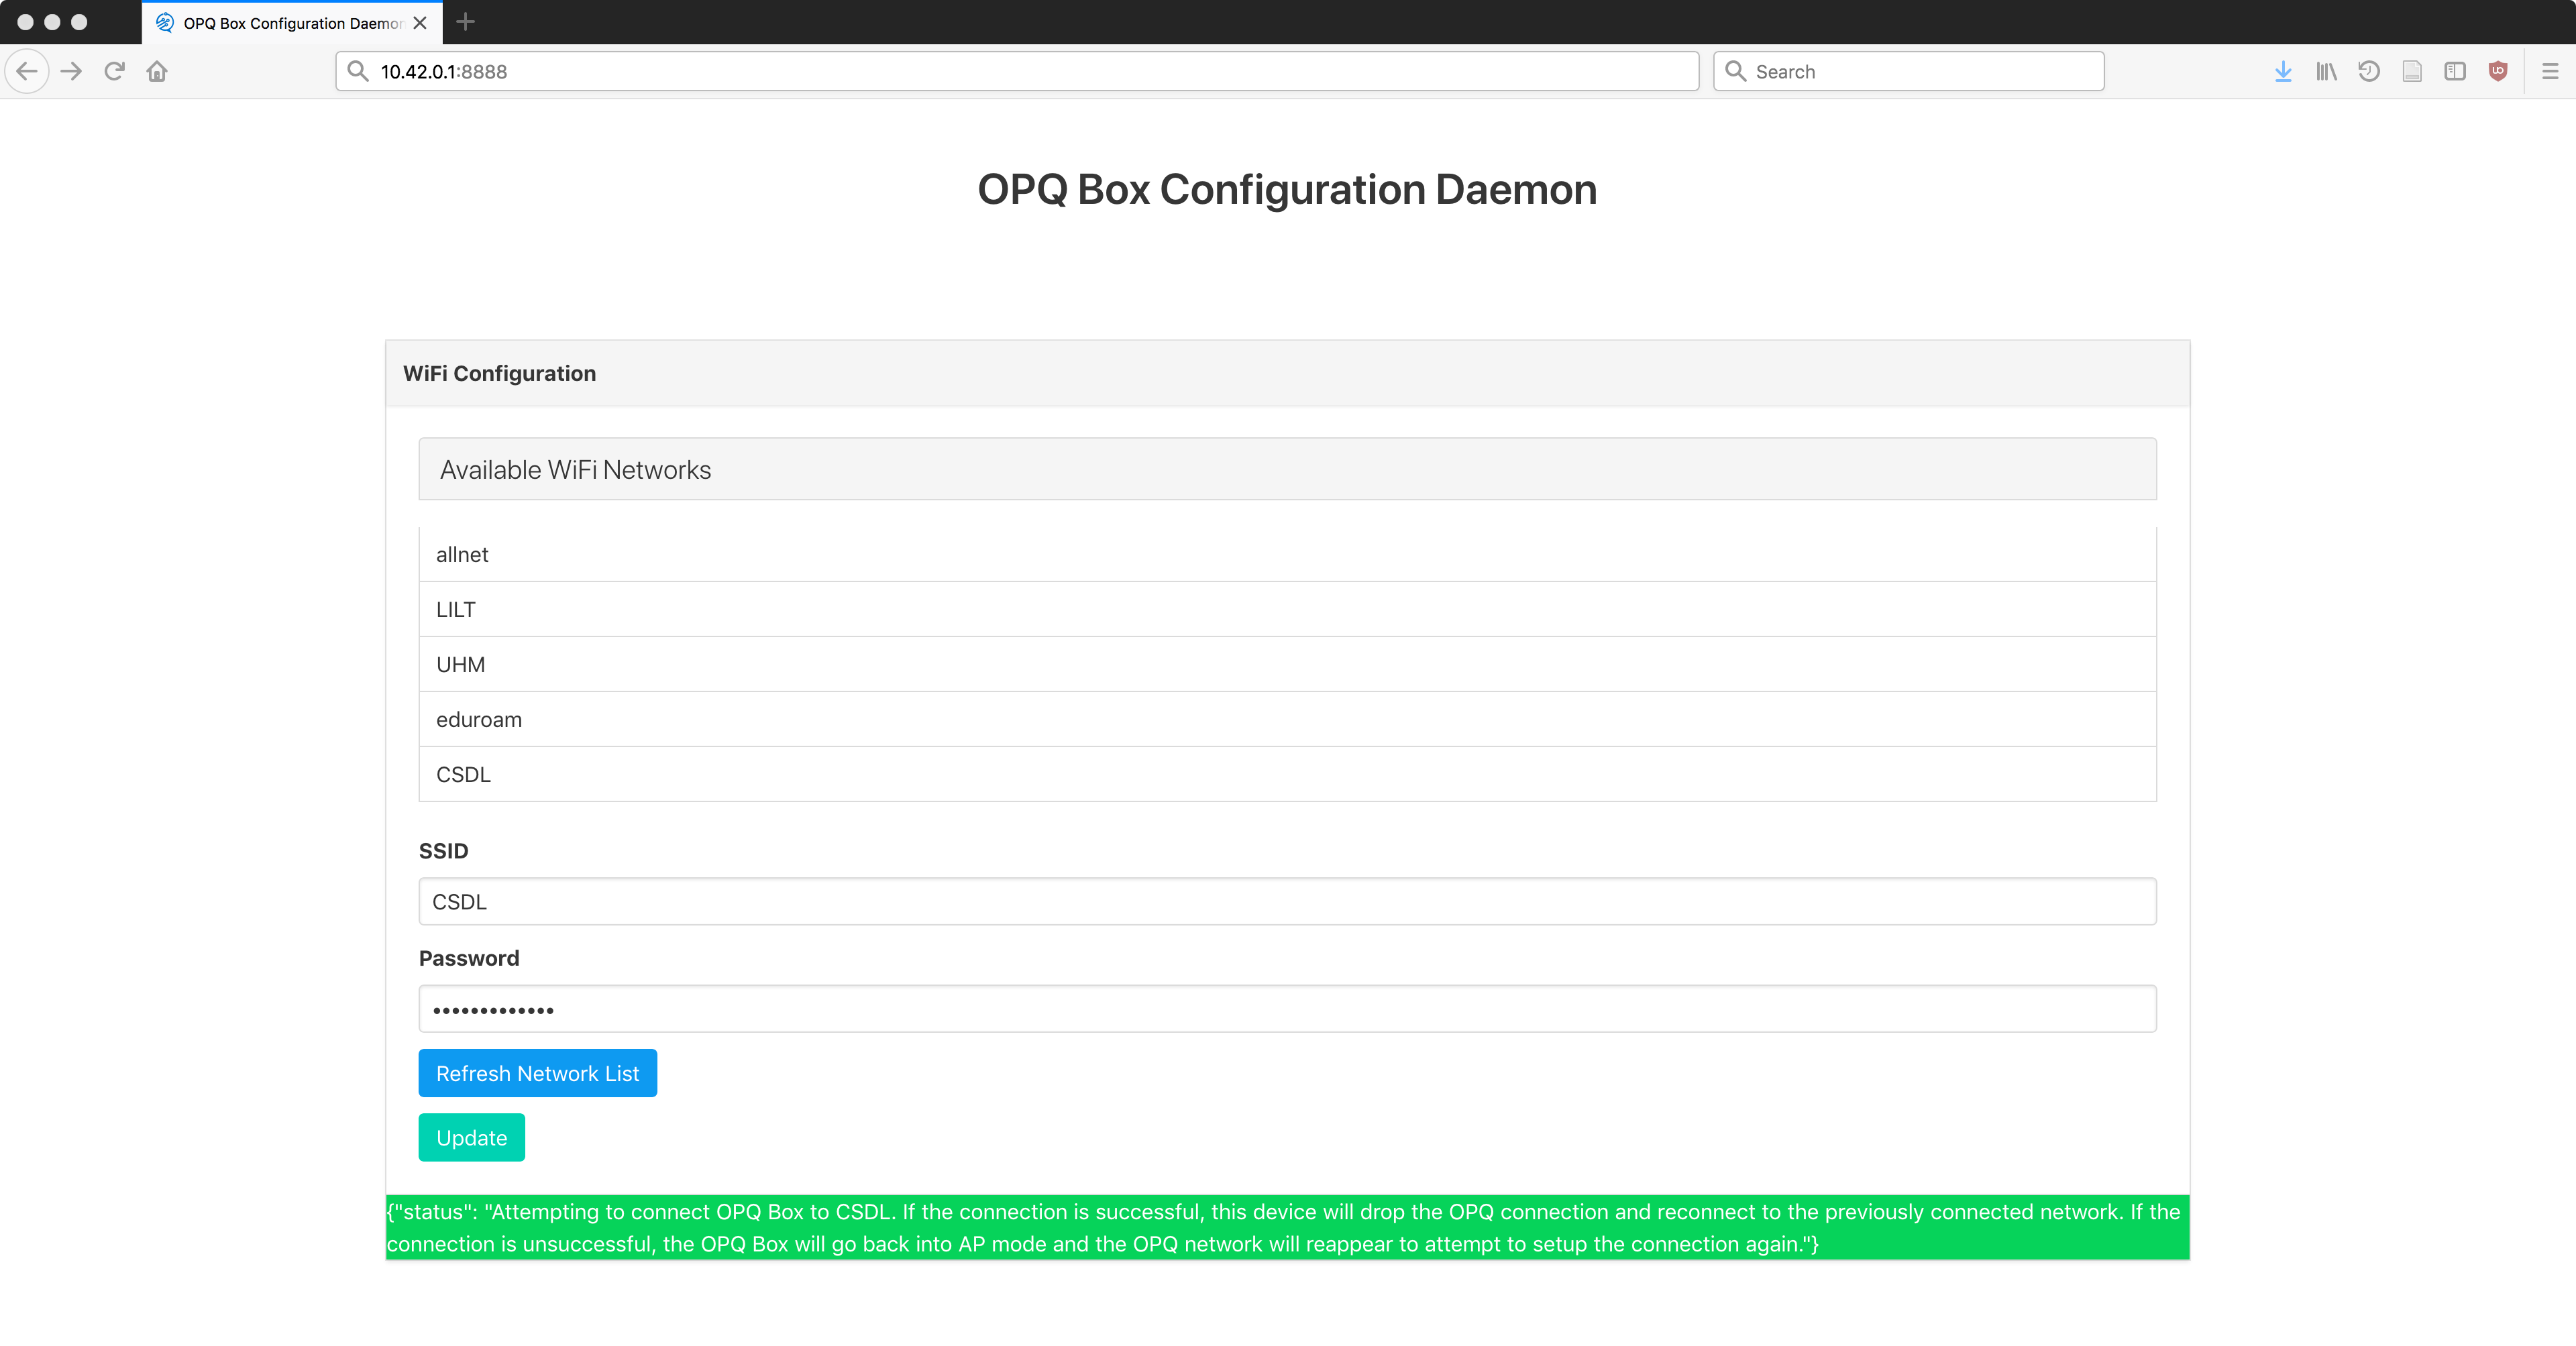
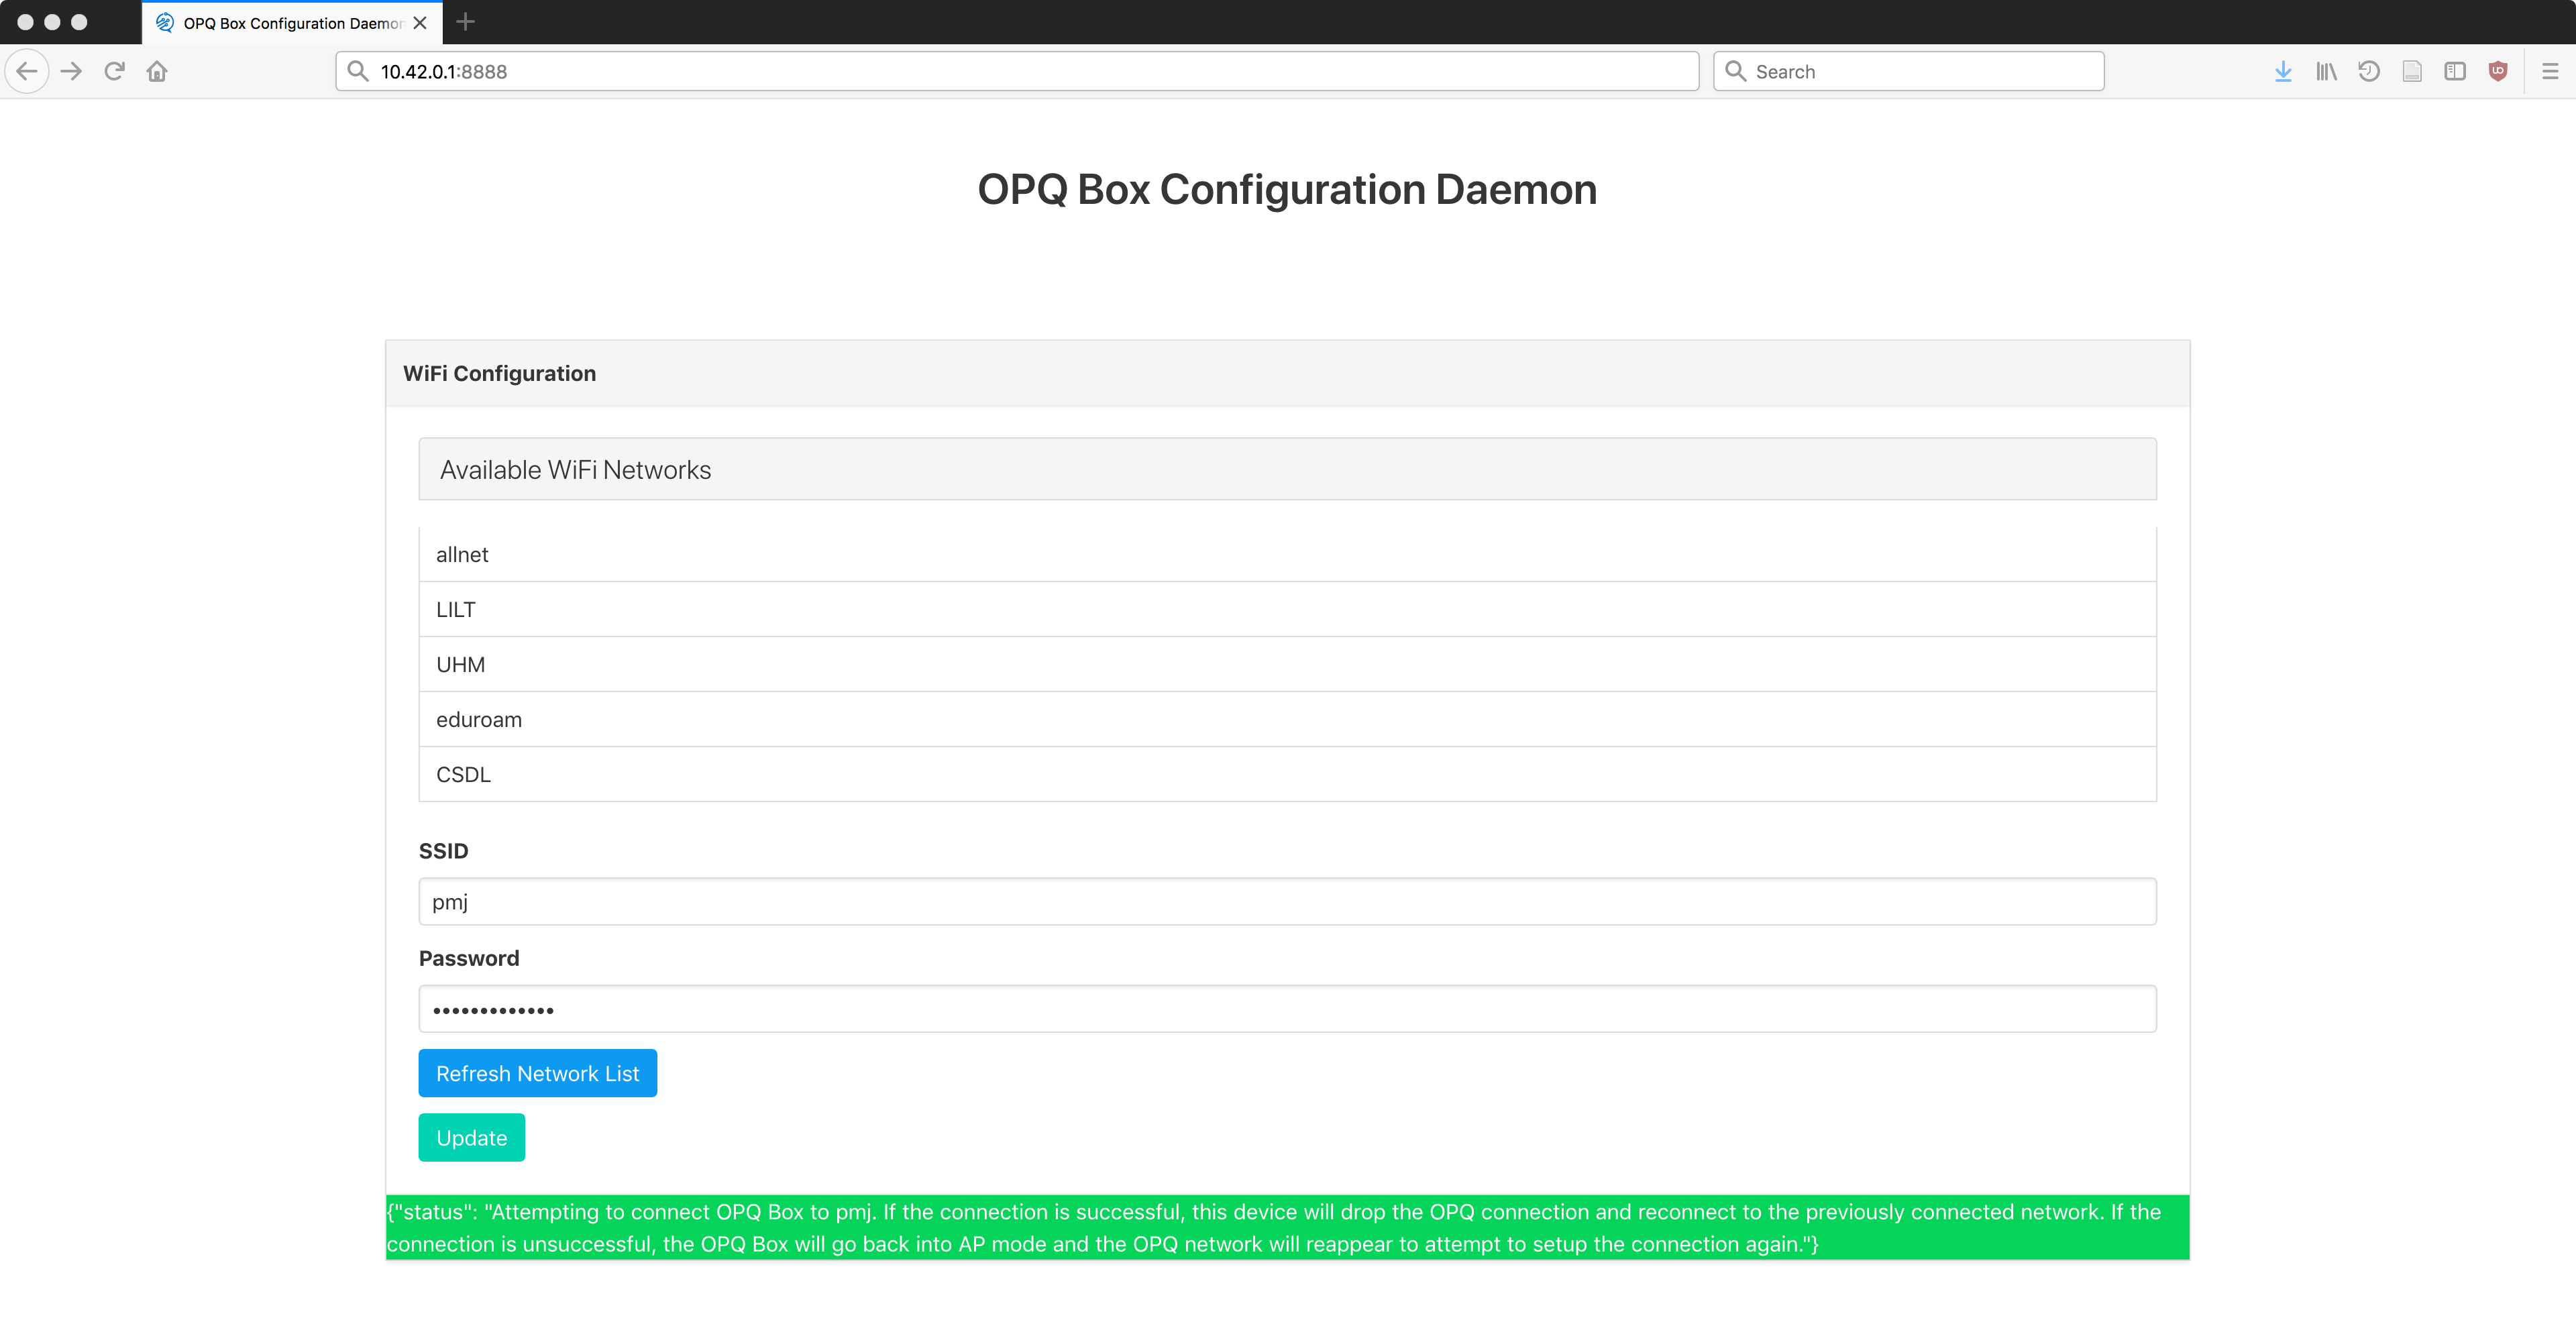
After clicking "Update", the OPQ Box will attempt to make a connection to that network. You should see a green status with a message similar to: "Attempting to connect OPQ Box to
An example of this is displayed in the following screenshot.
Clicking "Refresh Network List" will refresh and update the list of available, non-hidden networks.
If there are issues when attempting to retrieve the list of available SSIDs or attempting to connect to a network, the status box will turn red and display an error message.
Example: Connecting to a open network
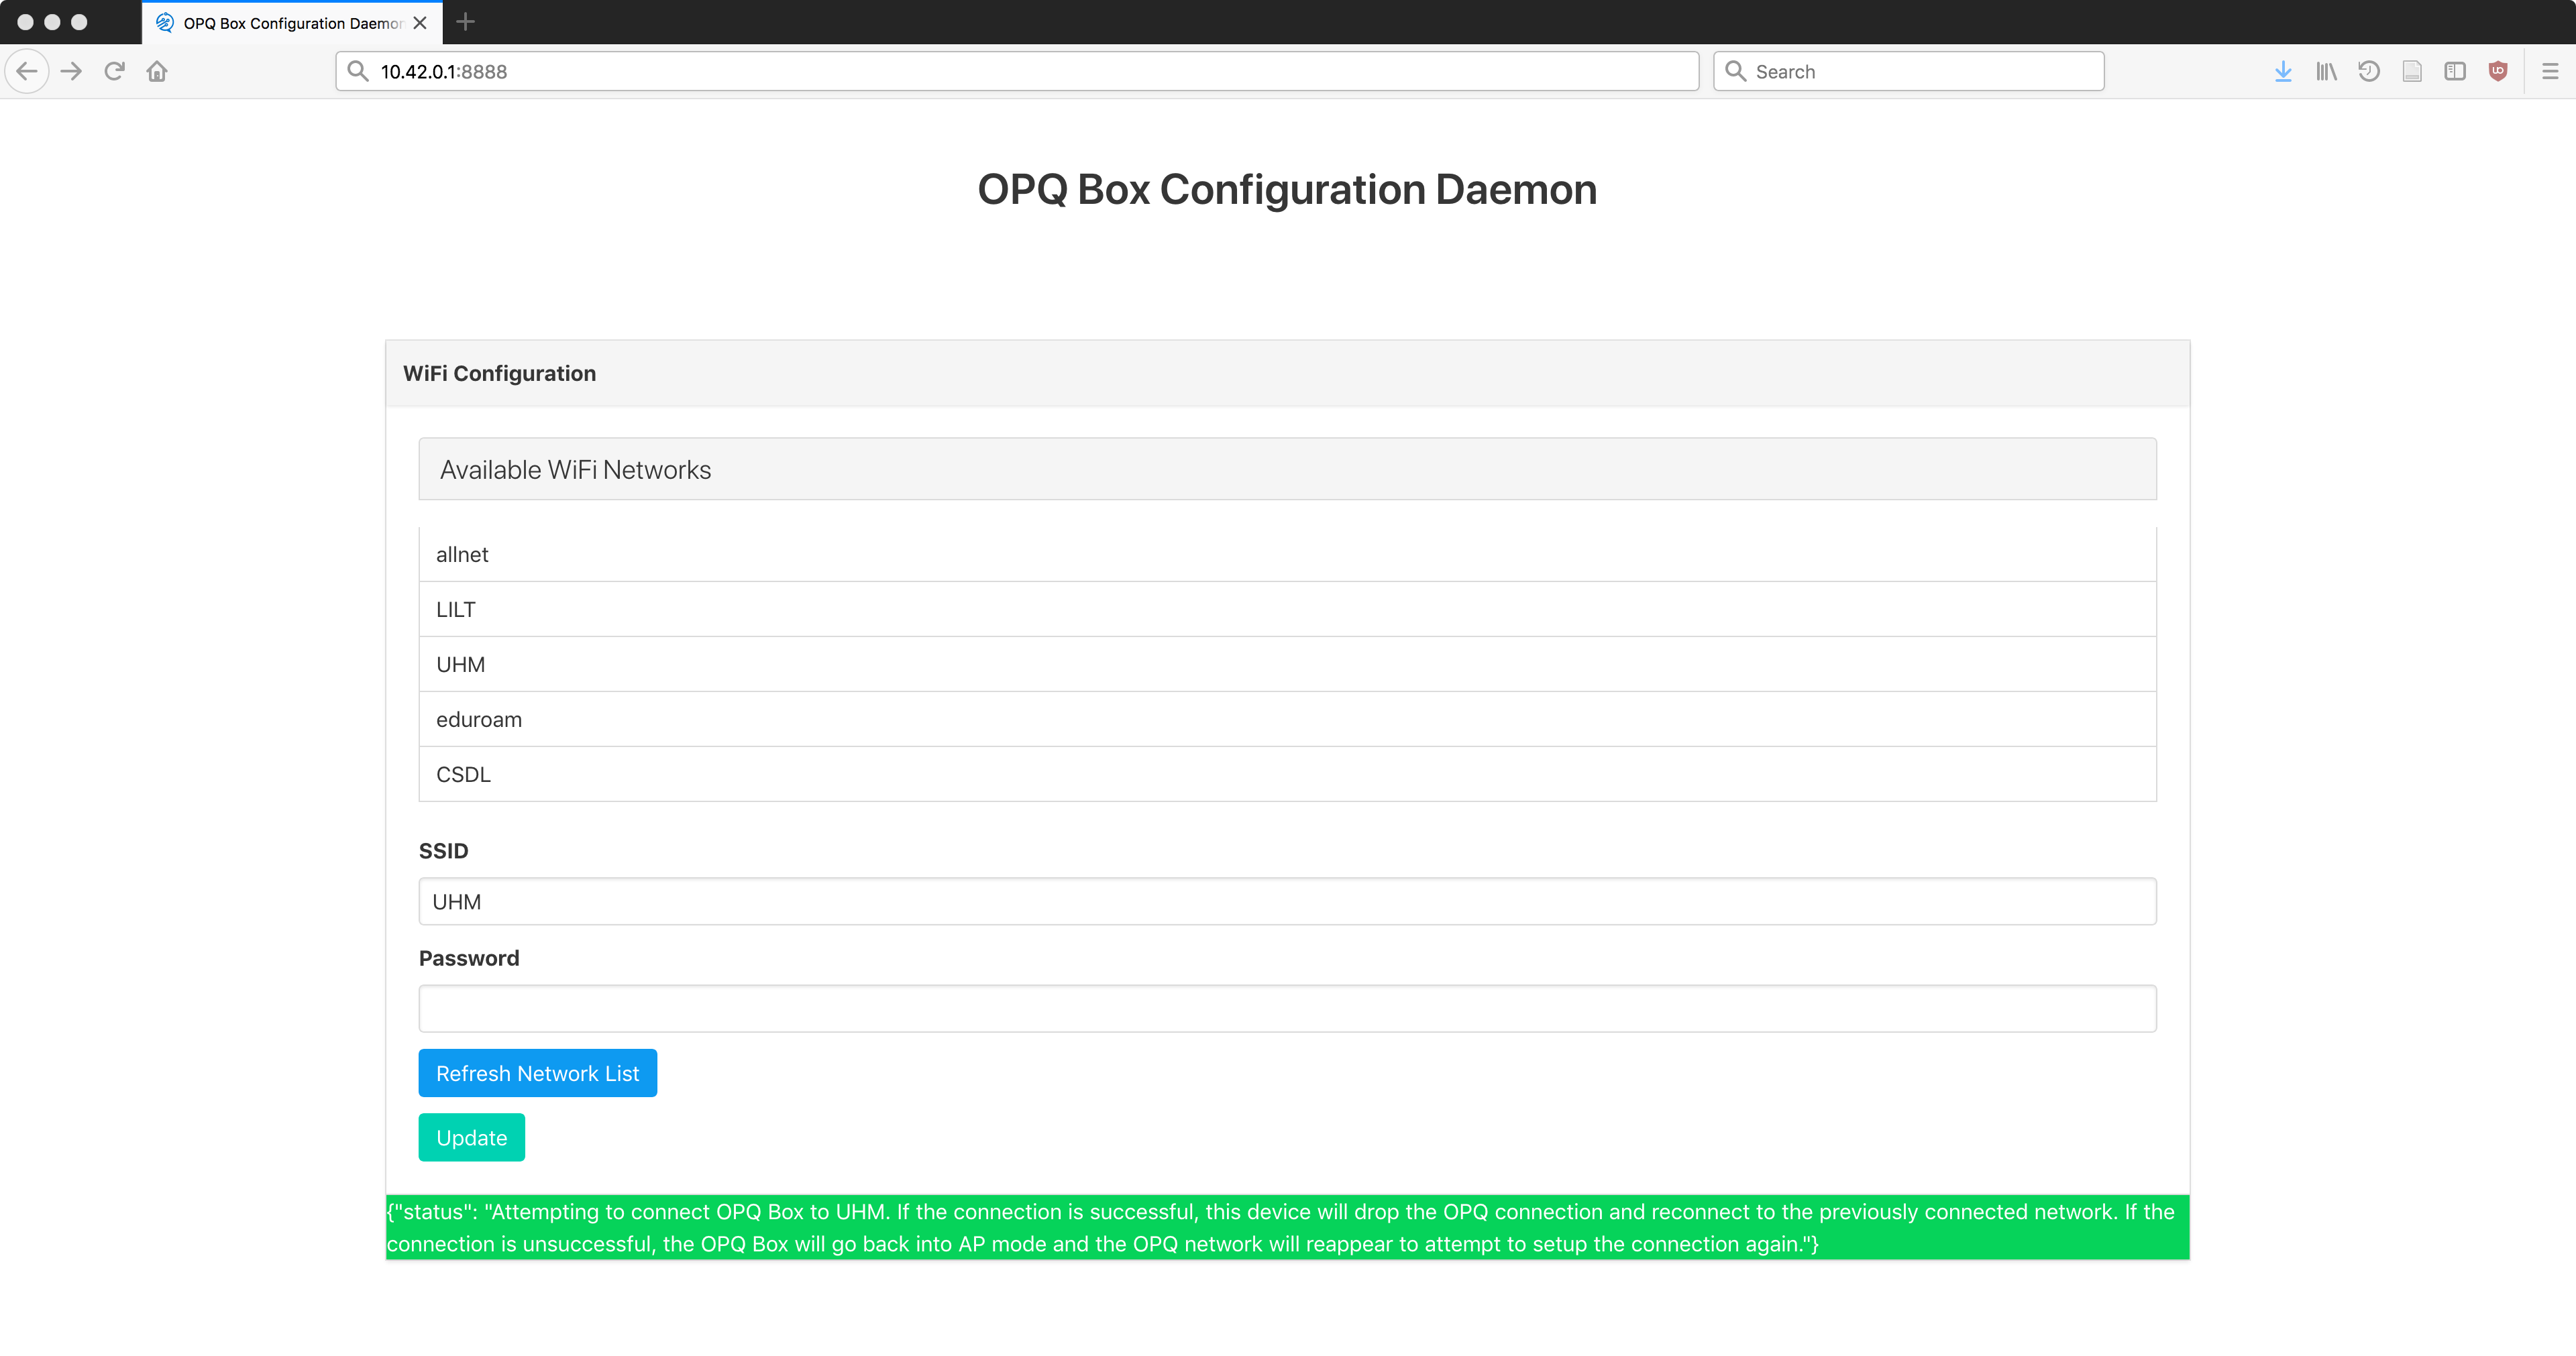
In this example, the UHM network is an open network that does not require a password to connect. UHM is selected and the SSID is copied into the SSID field. The update button is selected and an attempt to connect message is displayed. After about 30 seconds, the OPQ network disappears, and this indicates that the OPQ Box is connected to the UHM wireless network.
Example: Connecting to a password protected network
In this example, the CSDL network is a password protected network. CSDL is selected and the SSID is copied into the SSID field. A password is supplied to the Password field. The update button is selected and an attempt to connect message is displayed. After about 30 seconds, the OPQ network disappears, and this indicates that the OPQ Box is connected to the CSDL wireless network.

Example: Connecting to a hidden network
In this example, the pmj network is a hidden password protected network. Since the network is hidden, pmj is manually typed into the SSID field. A password is supplied to the Password field. The update button is selected and an attempt to connect message is displayed. After about 30 seconds, the OPQ network disappears, and this indicates that the OPQ Box is connected to the pmj wireless network.
Verify data transmission
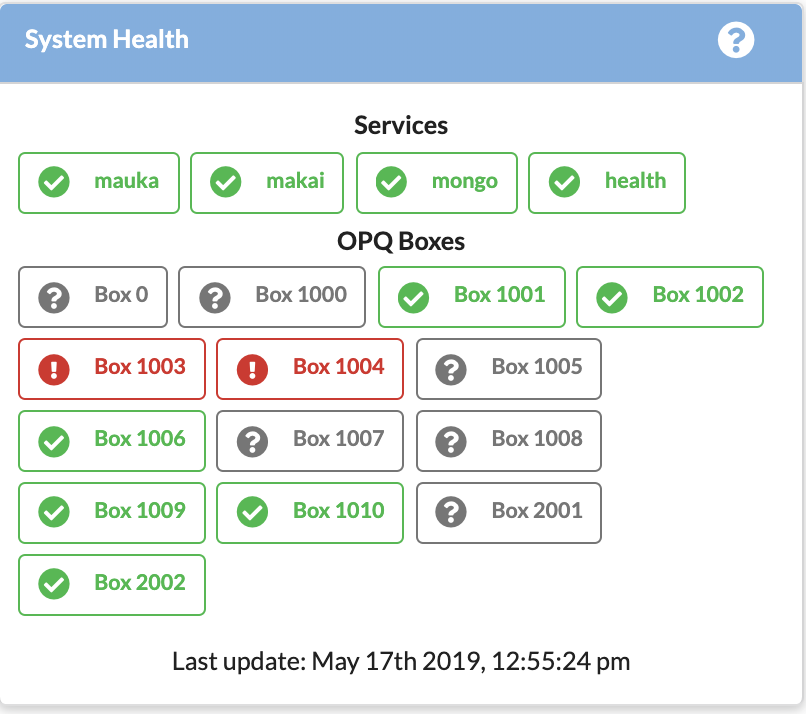
To check that your OPQ Box is transmitting data successfully, go to the landing page for OPQ View, and use the System Health component to see if there is listing for your Box and that it is green:
Your Box ID should be listed on the top panel of your OPQ Box.
To see the actual data for your Box, you can login and go the Live Data page. For example, you can see Measurement data in real time:

If you do not see your box listed, contact your OPQ Cloud administrator to diagnose the problem.
Advanced installation
OPQ Box configuration
Normally, each OPQ Box comes with a satisfactory default configuration. In some cases, you may want to customize these options.
The box-configuration-daemon provides a low level interface for setting the configuration options of the OPQ Box. To access the Box configuration options, connect to the OPQ access point and navigate to http://10.42.0.1:8888/. If the box is already connected to a wireless network and the OPQ access point is available, then you will need to determine the Box IP address and connect to the box-configuration-daemon from the same network at http://ip-address-of-box:8888/.
Once connected, scroll to the bottom of the page and you should see a section titled "OPQ Box Configuration". The following screenshot shows what this should look like:
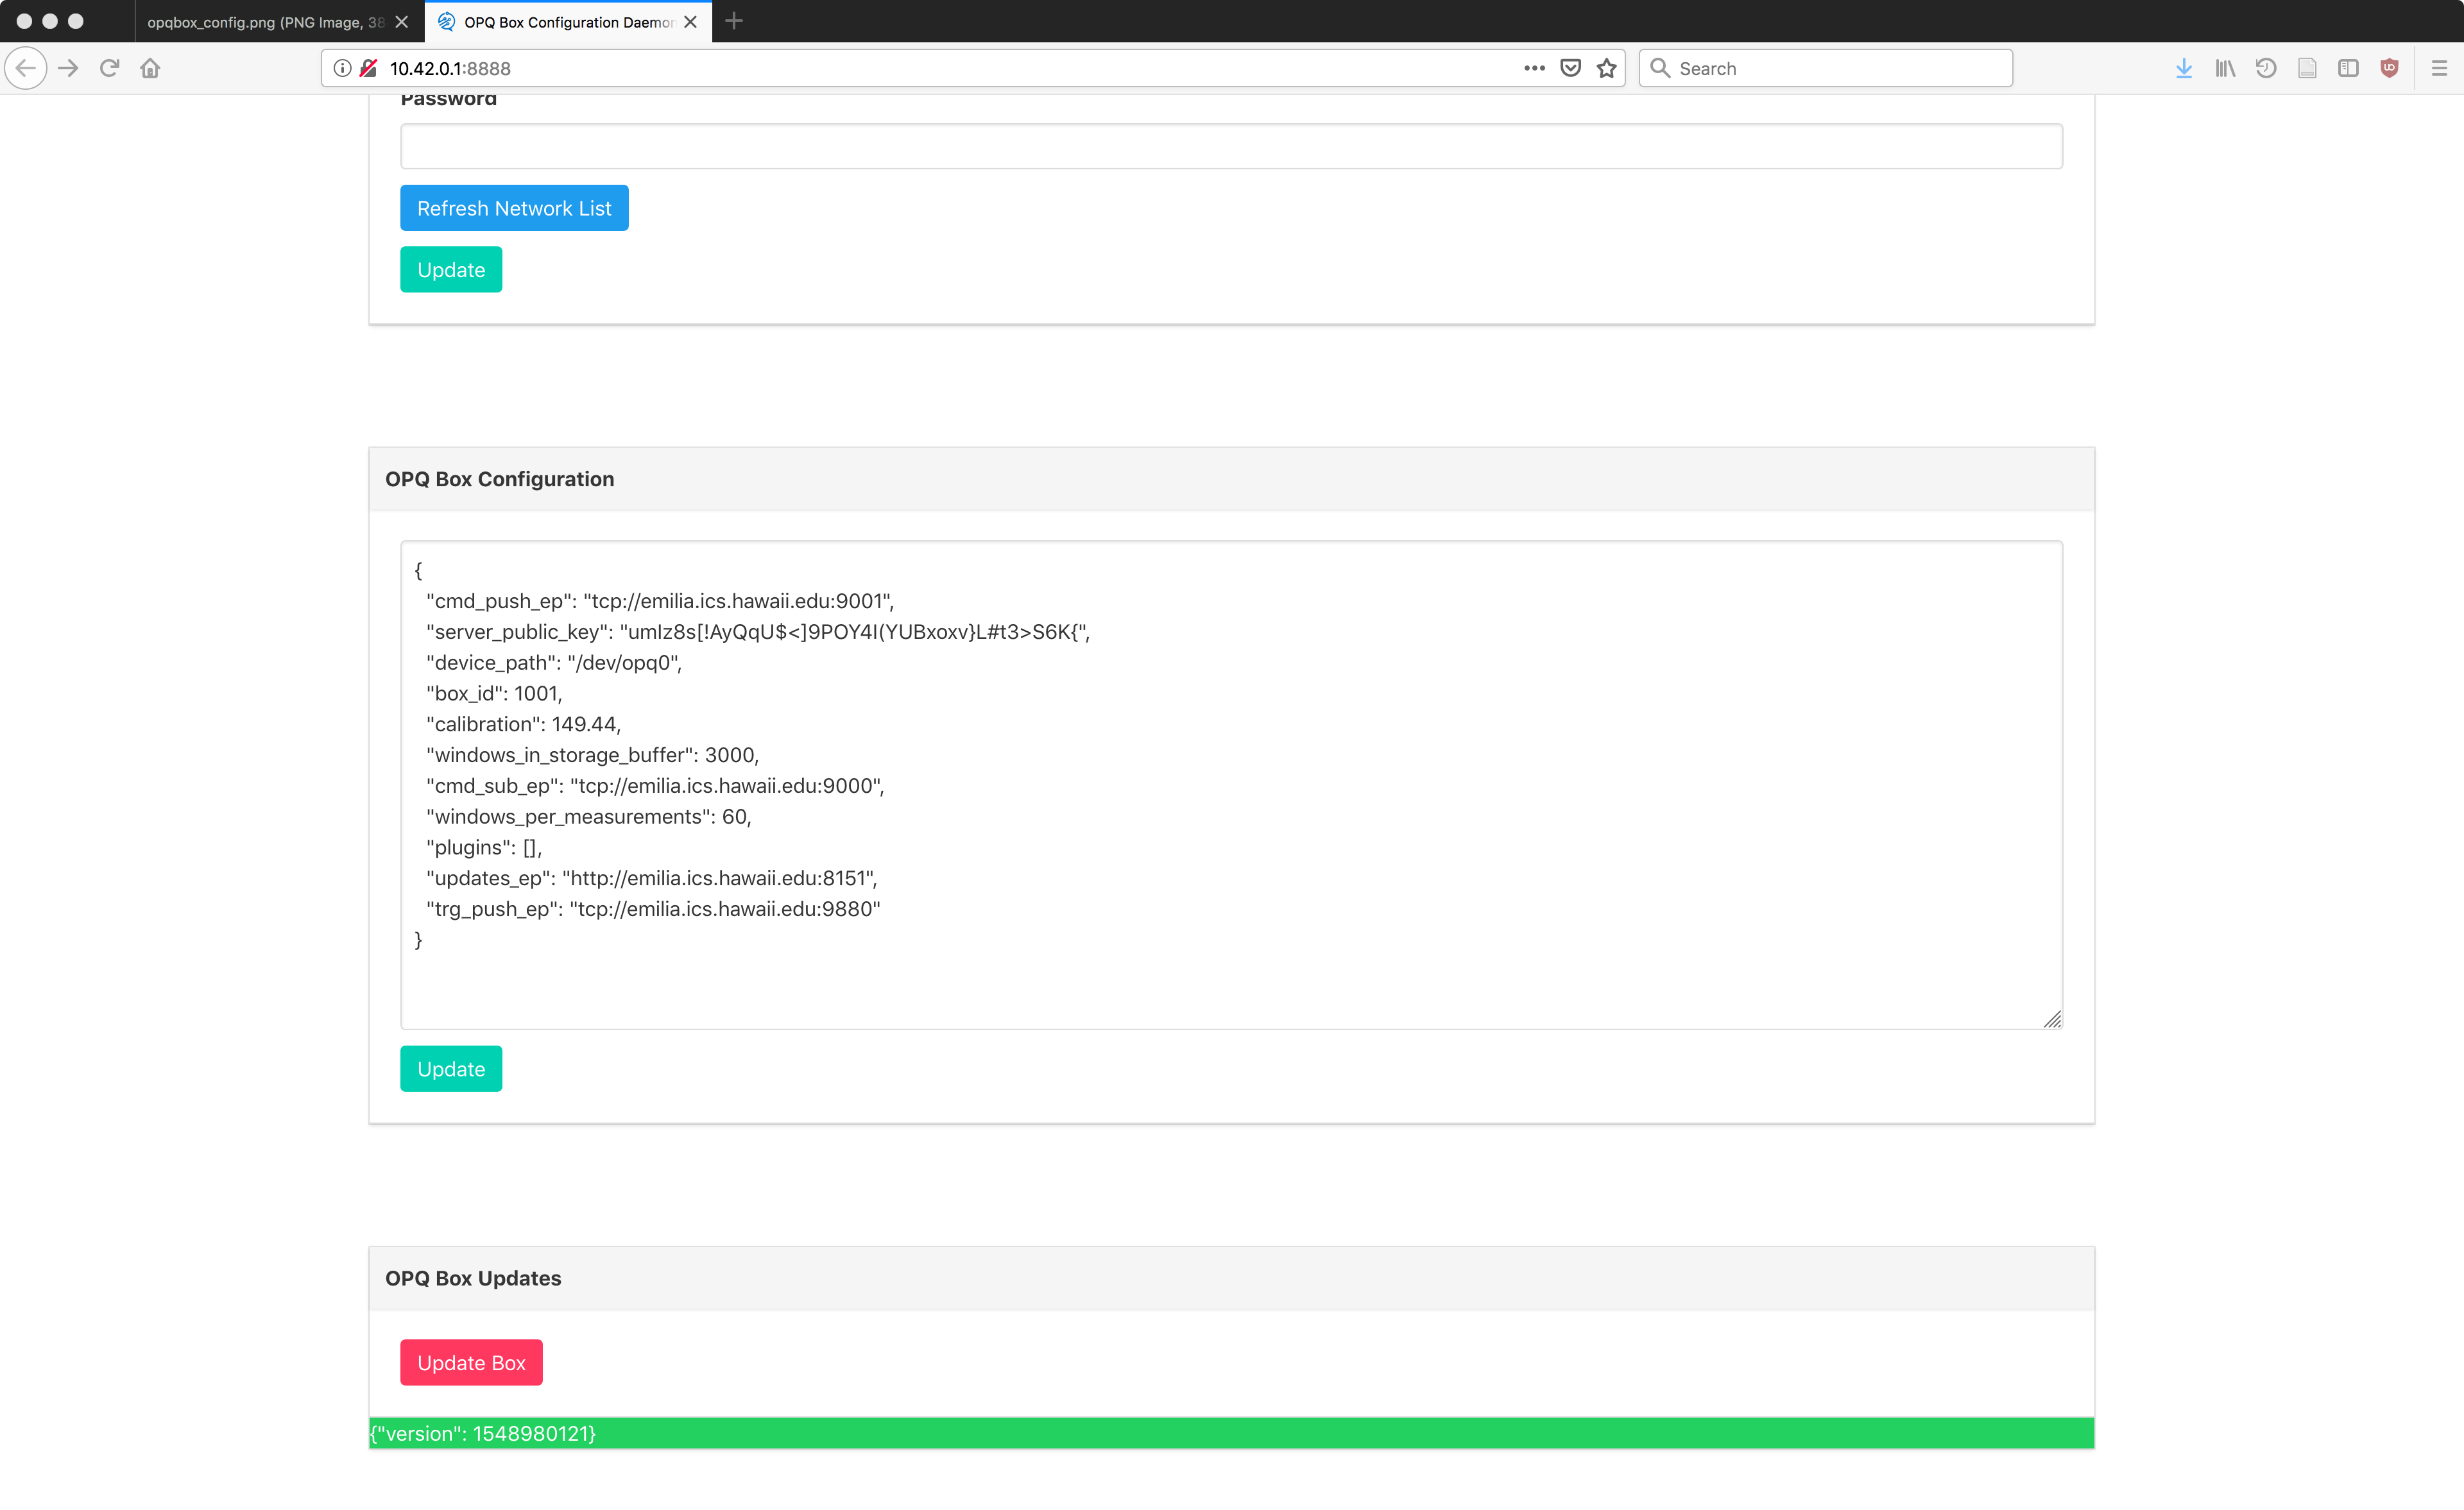
The configuration is provided in the form of a JSON file. Only valid JSON will be posted back to the box. The configuration is provided as sets of key-pair values. The current list of configuration keys are described in the following table.
| Configuration Key | Type | Description | Default |
|---|---|---|---|
| cmd_sub_ep | String | Subscription endpoint for acquisition (tcp://url_or_ip:port) | tcp://emilia.ics.hawaii.edu:9000 |
| cmd_push_ep | String | Push endpoint for acquisition (tcp://url_or_ip:port) | tcp://emilia.ics.hawaii.edu:9001 |
| trg_push_ep | String | Push endpoint for triggering (tcp://url_or_ip:port) | tcp://emilia.ics.hawaii.edu:9880 |
| updates_ep | String | Endpoint to check and pull OPQ Box updates (http[s]://url_or_ipcd :port/path) | http://emilia.ics.hawaii.edu:8151 |
| server_public_key | String | The public key of the acquisition server for data encryption | |
| box_id | Integer | The id of the box. Must be positive and unique. | |
| device_path | String | Unknown | /dev/opq0 |
| calibration | Float | The calibration constant for this box | |
| windows_per_measurement | Integer | Number of window rolled into a single measurement | 60 |
| windows_in_storage_buffer | Integer | Number of windows to buffer on the OPQ Box | 3000 |
| plugins | List[String] | List of plugins to load on OPQ Box |
When you are done editing your OPQ Box configuration, click the "Update" button. A green status message indicates success and a red status message indicates an error and provides an error message.
Your box will need to be restarted for changes to take effect.
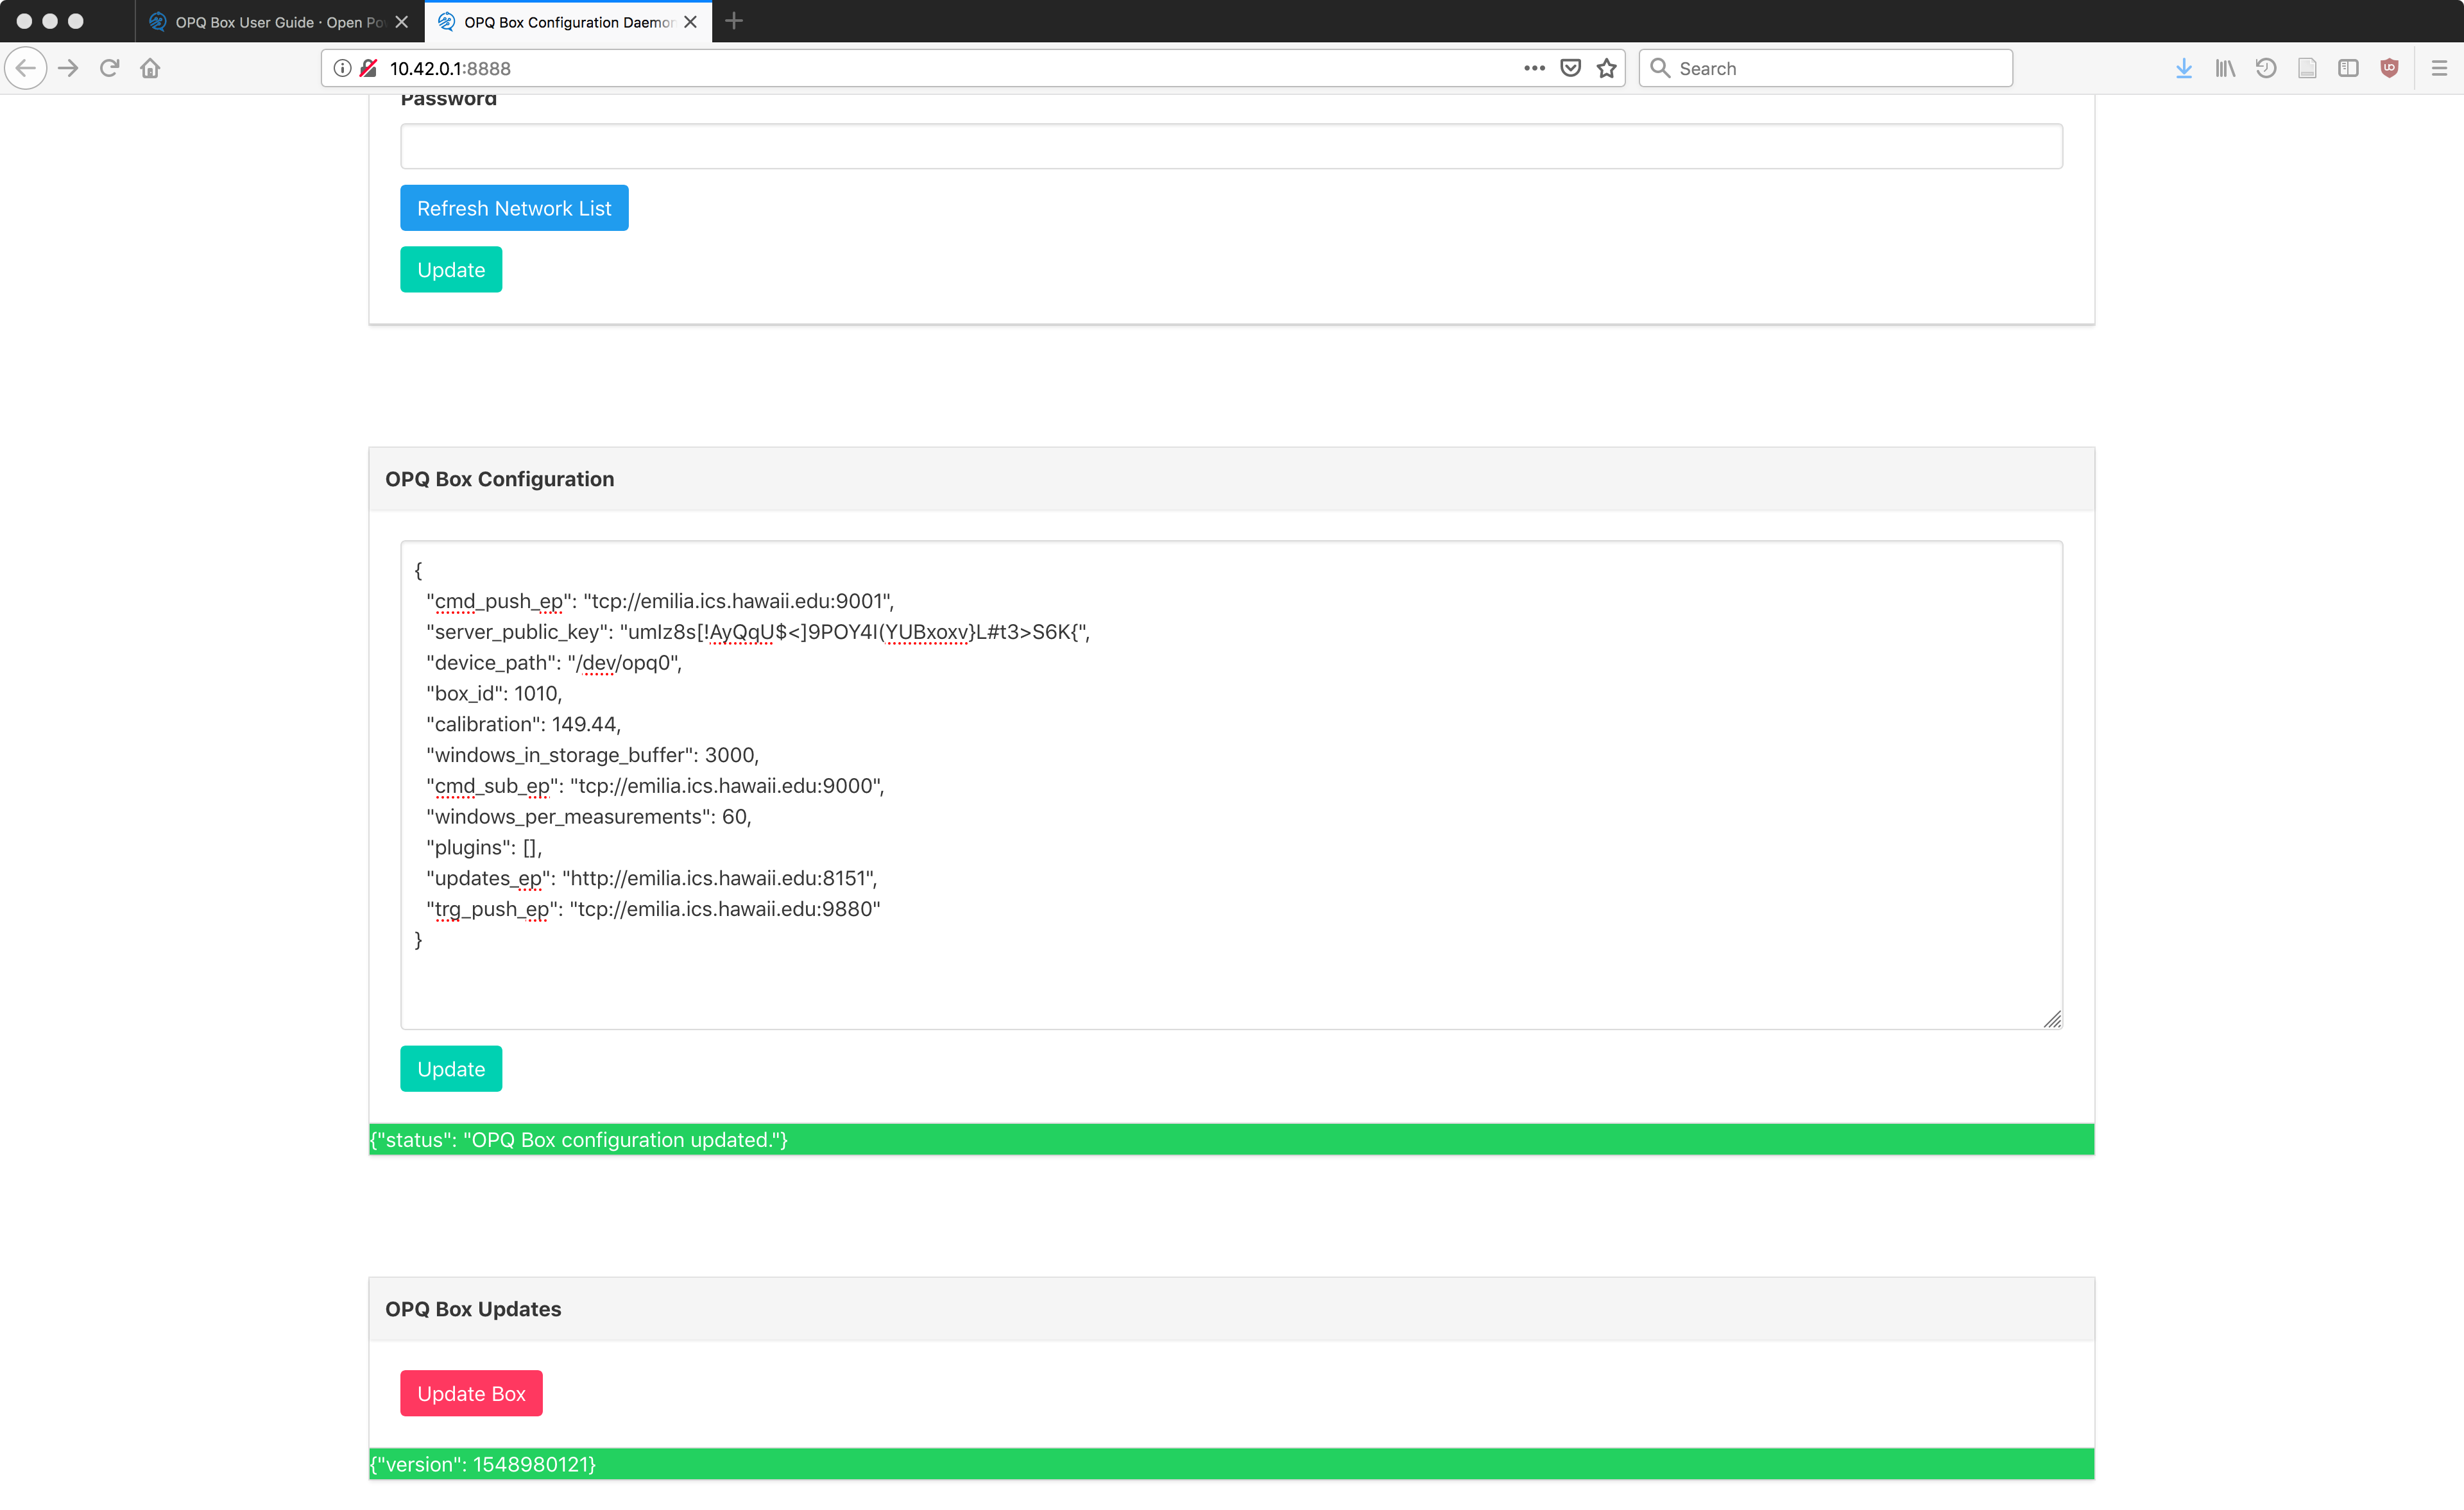
Example Box configuration success
In this example, we update the box_id from 1001 to 1010 and then click Update. Note: only OPQ Cloud administrators should edit Box IDs. If you specify the same ID as an already existing OPQ Box, then that data will be combined and you will not be able to distinguish the data from the two boxes.
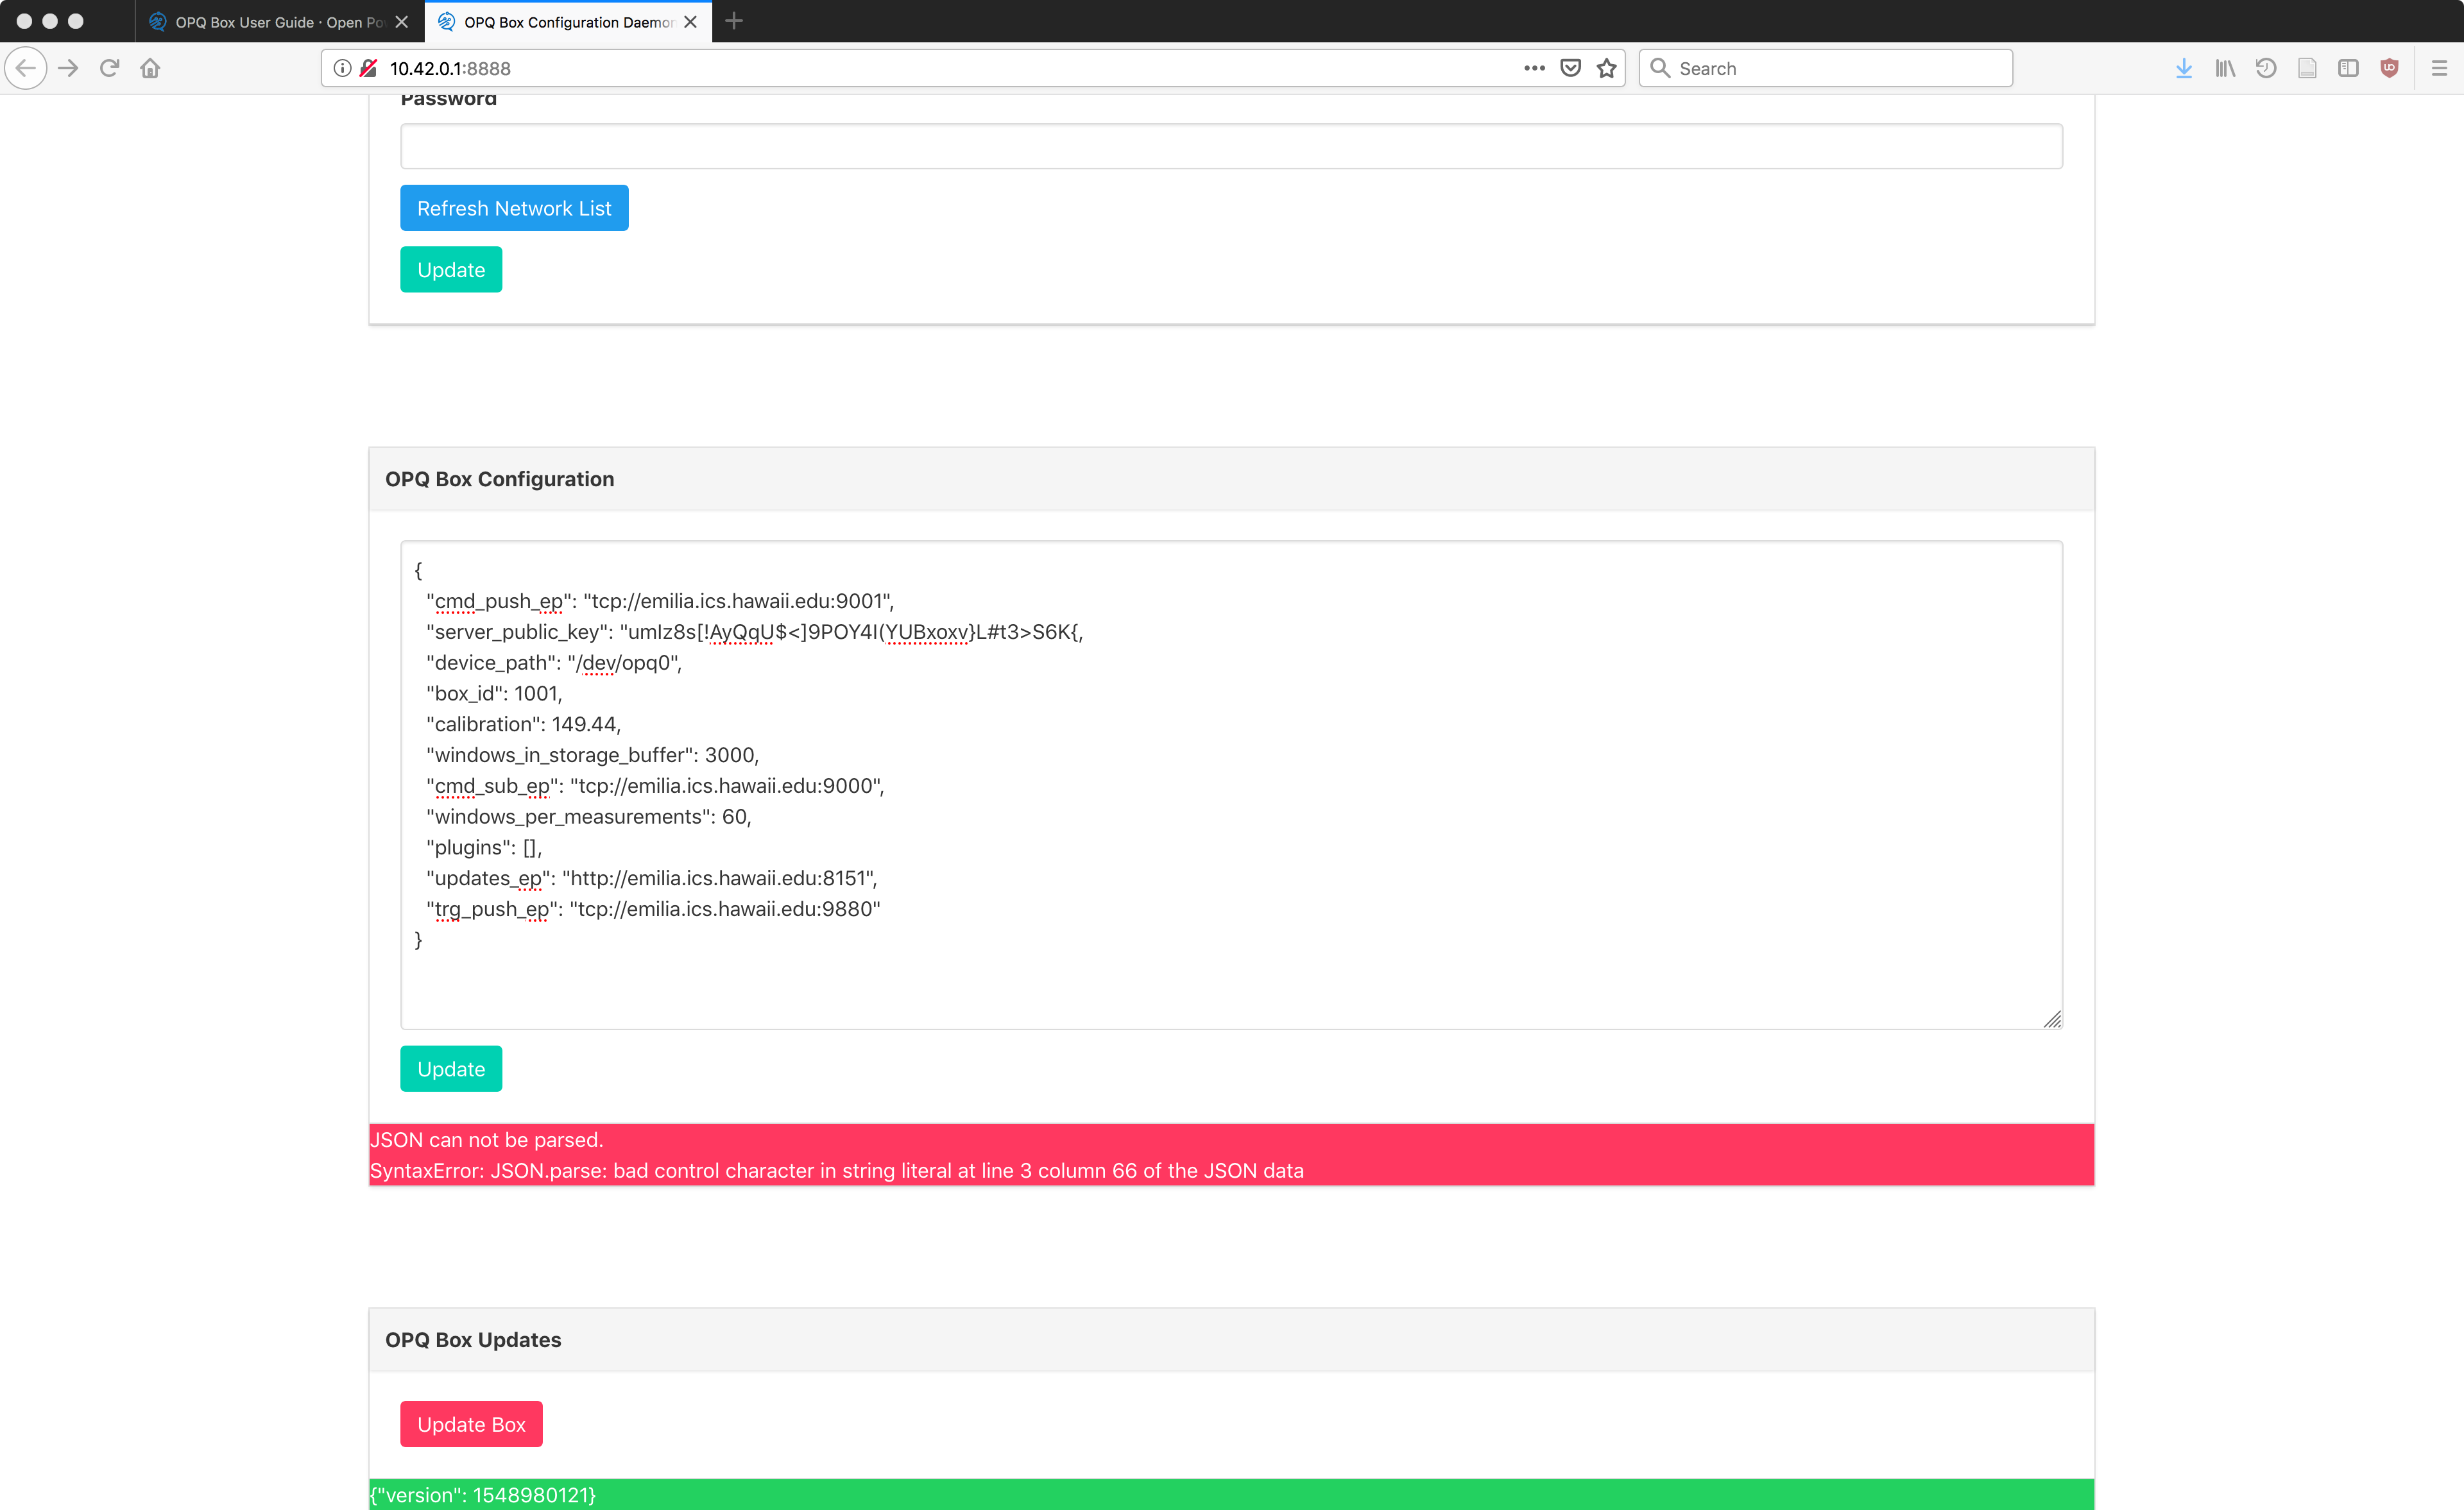
Example Box configuration error
In this example, we remove the closing quote " from server_public_key value, making the JSON invalid. Notice how the error message displays the location of the error.
Updating Box software
From time to time, new releases of OPQ Box software will become available. We have implemented a service to provide over-the-wire updates.
The OPQ Box Updater provides a convenient way to update an OPQ Box to the latest OPQ Box software. Updates are not done automatically and must be initiated by an OPQ Box owner. Here are the steps:
- Ensure that your OPQ Box is connected to the internet and streaming data (see above)
- Determine the local IP address of your OPQ Box
- Connect to the OPQ Box Configuration Daemon by going to: http://[local_ip_address_of_OPQ_box]:8888
- Scroll to the bottom of the OPQ Box Configuration Daemon until you see the
OPQ Box Updatesbox (screenshot below) - Compare the current version number (displayed as {version: ####}) to the latest version in your configured updates endpoint (e.g. if the updates endpoint is http://emilia.ics.hawaii.edu:8151, then http://emilia.ics.hawaii.edu:8151/version will display the most recent version available at that endpoint. If the number at the endpoint is larger than the current version, continue to step 6)
- Under the section
OPQ Box Updatesclick the buttonUpdate Box
This will pull the latest box update from the server configured by the updates_ep field. The following services will be stopped and then replaced:
- The OPQ Box Configuration Daemon
- Triggering
- Kernel drivers
- Firmware
Finally, the OPQ Box will reboot. This process can take several minutes to finish. After 5 minutes, navigate back to the OPQ Box Configuration Daemon and verify that the update took place by making sure the version number now matches the endpoint's version number.
For documentation on the design of the OPQ Box Updater service, see Box Updater.
